How to use color grading in Adobe Photoshop, Premiere Pro, and DaVinci Resolve
Color grading does the work natural lighting just can’t – as a content creator, it’s the closest thing you have to magic. But what is color grading, and how do you do it?

Color grading does the work natural lighting just can’t – as a content creator, it’s the closest thing you have to magic. But what is color grading, and how do you do it? Today, we’ll cover color grading in Photoshop, Premiere Pro, and DaVinci Resolve.
What is color grading?
Color grading is a process that manipulates the color within your videos to create a stylized look. Think of it like adding a filter on Instagram or TikTok – just a bit more complicated!
Color grading is often mistaken for color correction. They’re easy to mix up, but are very different.
Color correction is used to return your content to natural, neutral colors. It corrects content and makes it seem real, rather than creating a new ‘look.’ It means all of your content ‘matches.’
Color grading involves a degree of color correction, as you need some kind of starting point. However, you use color grading to achieve a certain look or feel, beyond what natural lighting provides. Think of Christopher Nolan’s Batman movies. Real-life doesn’t look like that – the filmmakers used color grading to portray a gritty, urban visual palette representing Gotham City.
Is color grading difficult?
For beginners, color grading can be daunting. It’s often more than just clicking on a preset filter and hoping for the best – it takes trial and error. Once you have the key principles and processes down, though, it becomes much more accessible and opens up a world of possibility.
What do you need to know about color grading?
There are three main things to know about color grading. If you remember nothing else, remember this: HSB. That stands for Hue, Saturation, and Brightness.
- Hue: This is the color itself. It’s measured from 0 to 360 and runs through red, orange, yellow, green, blue, and violet. You can remember the Hue spectrum by thinking of a rainbow, as it cycles through the same colors in the same order. Hue is sometimes called ‘Pure Color.’
- Saturation: This is a sliding scale between gray and Pure Color, measured from 0 to 100%. It shows how intense a color is. If you’re at 0%, the image will be washed-out and bland. As you increase the saturation, the colors become stronger and more vivid.
- Brightness: You know what this is – the difference between white and black! How light things are. Like saturation, it’s measured from 0 to 100% and can change your footage’s mood on a dime.
Once you’ve learned your HSBs, it’s time to memorize another acronym: RGB. This one’s slightly easier to repeat, given that it just means Red, Green, and Blue. Each pixel on a screen is made from a combination of these three colors, so manipulating any of them can give you greater control and help you better understand the outcomes of your color grading adventures.
A master of color grading isn’t only good at color grading. They’ll know how the colors work best with different mediums, actors, stimuli, and more.
One of those things is audio. A weird, misplaced soundtrack can derail a perfectly color-graded piece of content. That sucks.
At Epidemic Sound, we have more than 50,000 tracks for you to choose from, searchable by genre, tempo, mood, theme, and more. Don’t settle for second-best – check out the catalog below.
Before we get into the step-by-step details of accessing color grading, here are some general rules to follow to make the best content.
Use contrast to set the mood
High saturation is a quick way to achieve high contrast, which is great for cinematic or moody content. You might want to keep contrast low if you’re doing an emotional, low-key thing. It’s all case-by-case, but as you grow more comfortable with these tools, you’ll figure out what works best for you.
Don’t just rely on saturation, though
You can use split-toning to create contrast. This means pushing the cool, darker colors into the shadows and highlighting the warmer, sunnier colors. If you work out how to nail this, the results can be stunning.
Use color grading to emphasize skin tones
Color grading can result in people’s skin taking on an unnatural color. To combat this, you can key out the skin tones while you grade, then bring them back in later using the color wheel.
Always consider the mood of your content
Remember that color grading is used for style. It creates a mood. A feeling. If you studied English at school, you might have seen the term ‘pathetic fallacy:’ giving human emotions and feelings to animals or objects. You can do the same thing with color grading – your work can make the difference between a short horror film being scary and funny or scarily unfunny.
Think of color palettes you love
Take inspiration from content you admire! The movie Mad Max: Fury Road was strikingly graded and became an obsession for certain filmmakers and content creators. As a result, there are now preset color grading packs based on the film, if you want your content to look all dusty and… apocalyptic.
Now you know what color grading is and have some top tips, how do you do it in popular editing apps and software? Here’s how to access all those tools in Photoshop, Premiere Pro, and Resolve.
How do you do color grading in Photoshop?
Accessing color grading in Adobe Photoshop is super easy! Here’s how.
- Open your media file in Photoshop, then click the ‘Filter’ button in the toolbar at the top of the screen. Then, scroll down to ‘Camera Raw Filter’ and give that a click.
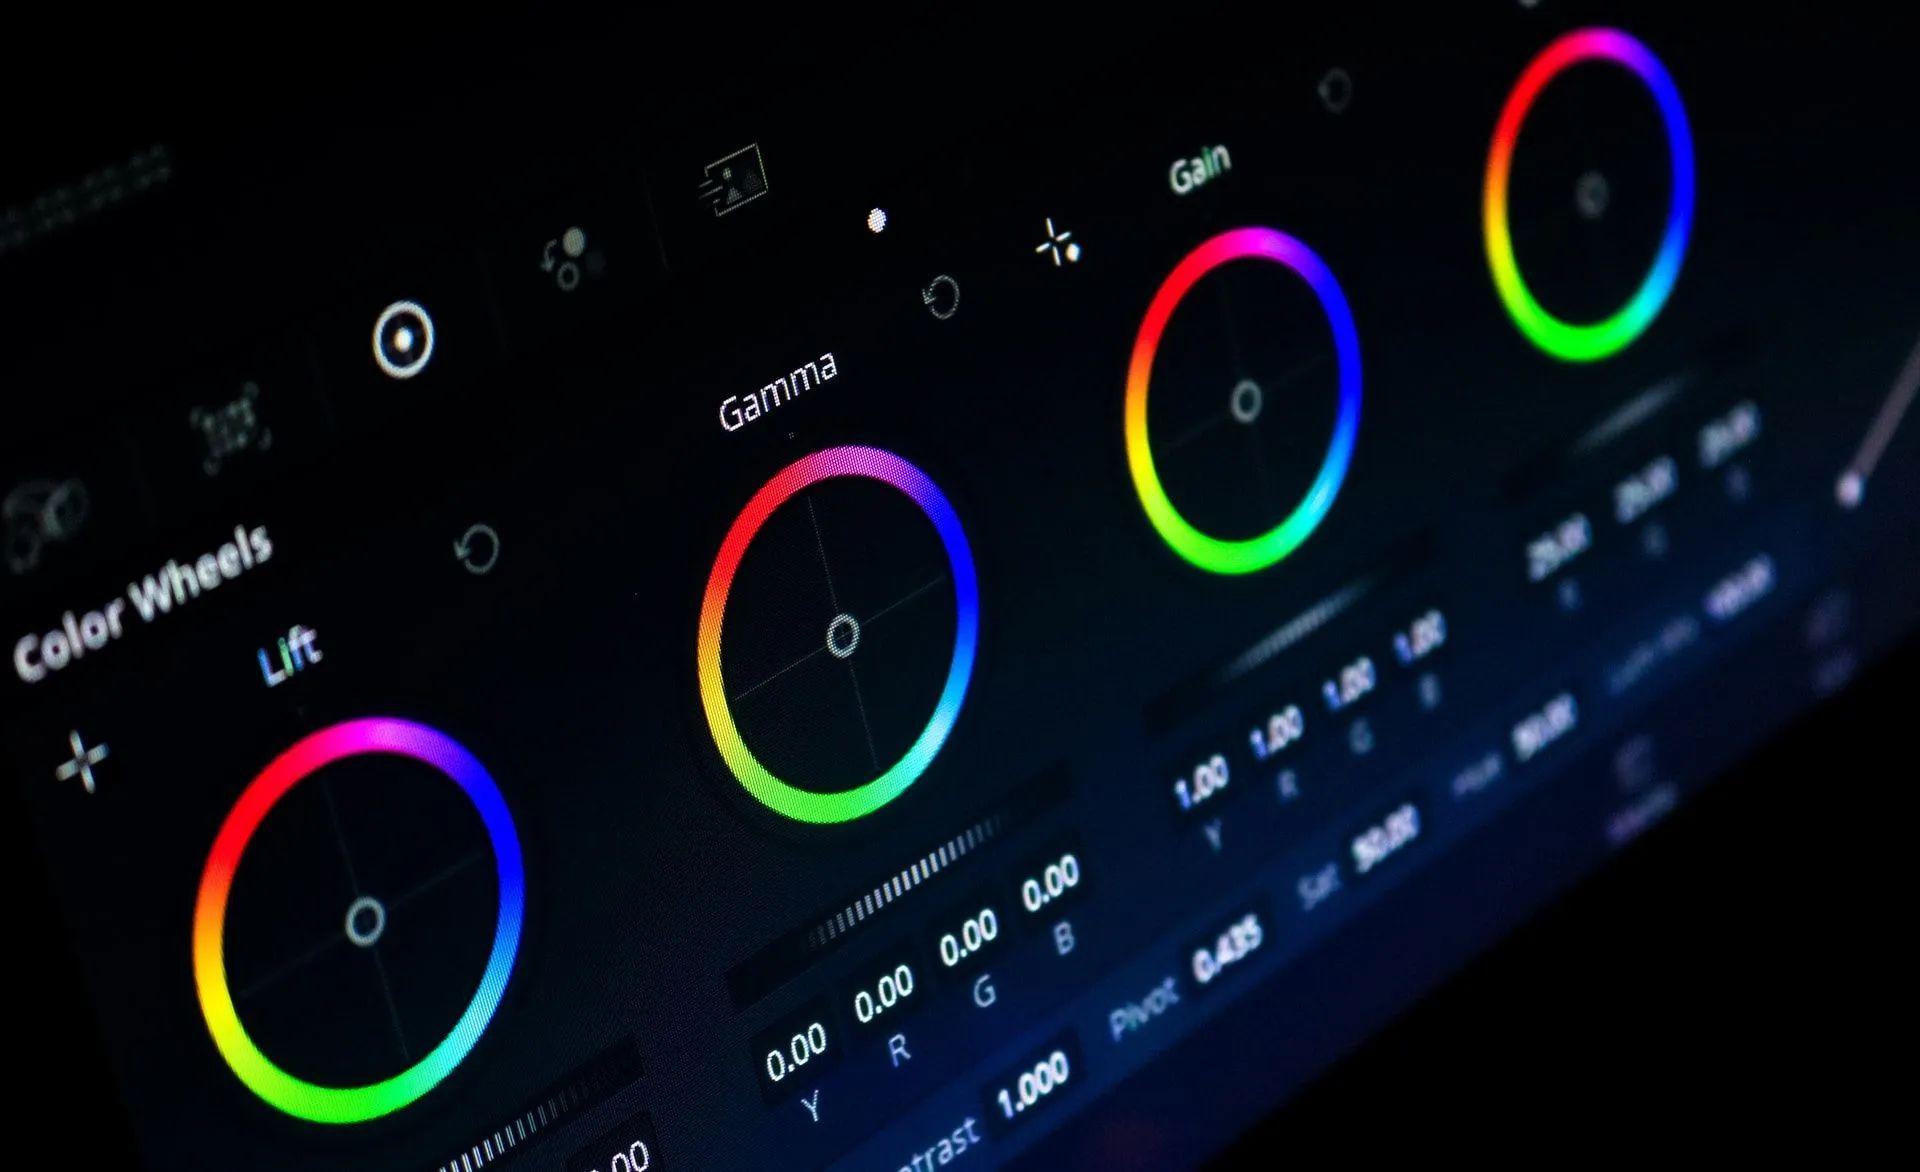
- You’ll be presented with a menu at the right of the screen. Scroll down to the ‘Color Grading’ option, which will expand into a bunch of options. Here, you can play around with the mid-tones, shadows, and highlights in their respective color wheels.
How do you do color grading in Premiere Pro?
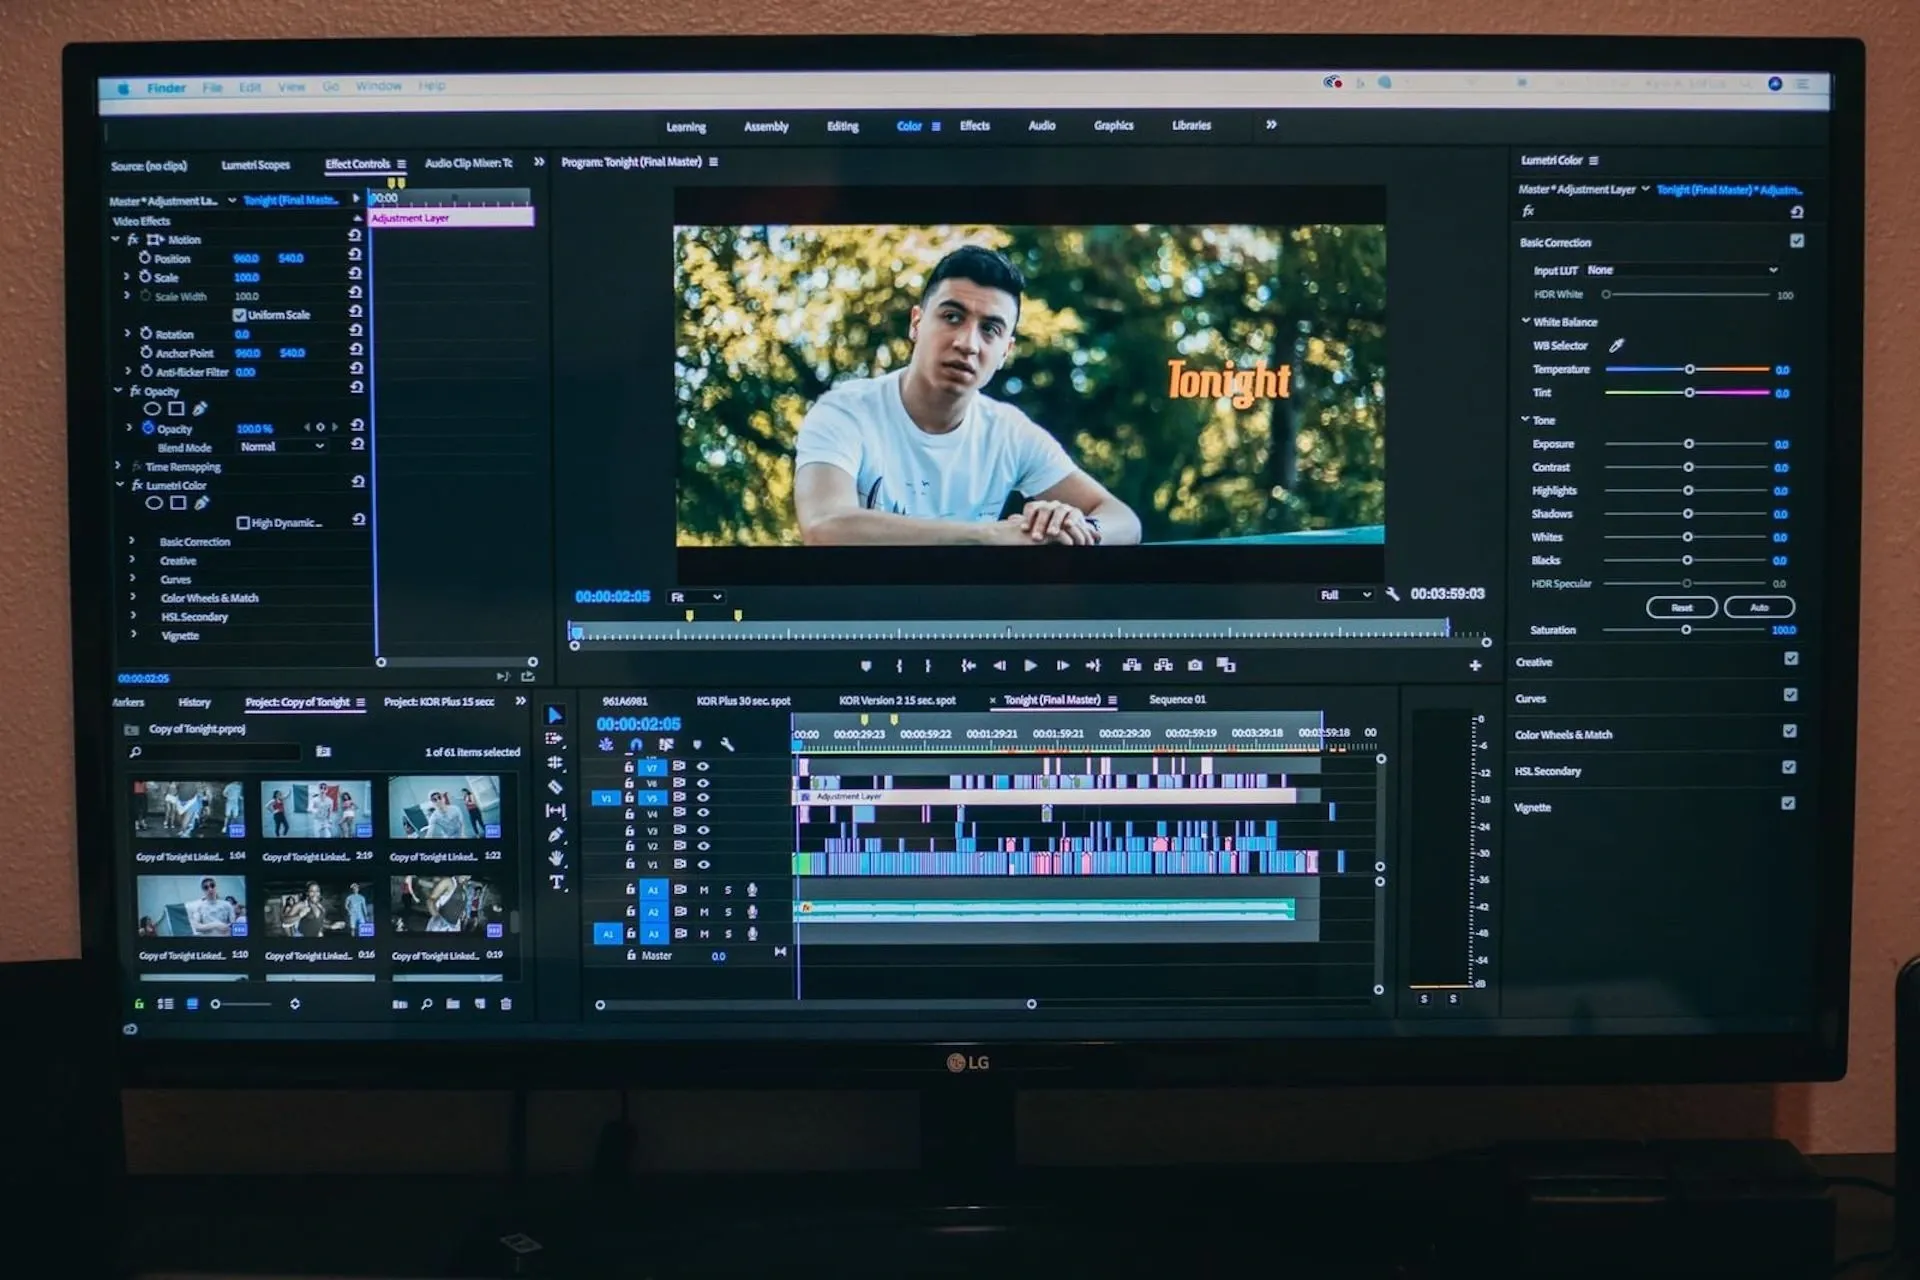
Color grading in Adobe Premiere Pro is relatively simple, too. To access the tools, follow the steps below.
- Load your footage into Premiere Pro and create an adjustment layer. The adjustment layer is an overlay you can move around the project timeline, rather than editing the source footage. This is a great way to do color grading, as it means you can easily swap things around.
- Right-click the Project panel, select ‘New,’ then ‘Adjustment Layer.’ The layer appears in the Project panel – drop it onto the project timeline, above the clip you’d like to alter with color grading.
- Switch to the ‘Color’ workspace near the top of the screen. This brings you to the Lumetri Color Panel, where you can view the same color wheels as in Photoshop. You can also import LUTs (Lookup tables,) which are preset filters for color grading. People make LUTs themselves, but there are plenty out there, both free and paid-for!
How do you do color grading in DaVinci Resolve?
DaVinci Resolve is a little more advanced than Photoshop and Premiere Pro, but it’s perfect for color grading. Why? Well, it was initially created as a professional color grading solution! You can get started by doing the following.
- Open your footage in Davinci Resolve, then click on the ‘Color’ page. You can find this towards the bottom of the screen, between the ‘Fairlight’ and ‘Fusion’ pages.
- That’s pretty much it. It’s a fairly comprehensive hub for all your color grading needs, and user-wise, it’s a dream. Its placement in the bottom taskbar means it doesn’t interrupt your workflow – you just hit ‘Color’ any and every time you want to spice up your edit.
Once you access the color grading tools in Photoshop, Premiere Pro, and Davinci Resolve, you’ll not have enough hours in the day. Corny as it sounds, the possibilities really are endless.
With that in mind: don’t let substandard music impact your content. If you’re struggling to find the perfect track to accompany your content, we’ve got your back.
We offer a direct license. This means we own all the financial rights to our music – the only person you’ll be paying is us. Just sign up for Epidemic Sound, select a plan, and add the channels you’re using to publish your beautiful, immaculately color-graded content. No hassle, just great tunes. Sign up below.

Are you a video editor or filmmaker? Whether you’re an absolute master or just a beginner, discover what Epidemic Sound has to offer on our Epidemic Sound for Filmmaking page. Oh, and if you’re looking for some background music for your videos, we got you covered.
Related posts: