Top 5 video editing tips in Premiere Pro
Content creator Lizzie Peirce goes through her top five editing tips in Adobe Premiere Pro, how to best edit your videos, and the best Premiere Pro effects. In collaboration with Adobe Stock and Epidemic Sound.

In this blog post, content creator Lizzie Peirce goes through her top five hacks for video editing in Adobe Premiere Pro and the best Premiere Pro effects. In collaboration with Adobe Stock and Epidemic Sound.
The first time you're opening up Adobe Premiere Pro, it's exciting; you're hopeful, full of dreams, and ambitious... But it's also terrifying. Premiere Pro is a detailed and high-end editing software, which of course means the possibilities are endless.
At the same time, once you first get into the program, it can be intimidating. There are a lot of buttons, options, and panels, and it's hard to know where to begin. So let's jump right to the tips that will bring your video editing skills to the next level.
Tip #1: Premiere Pro Freeze frame
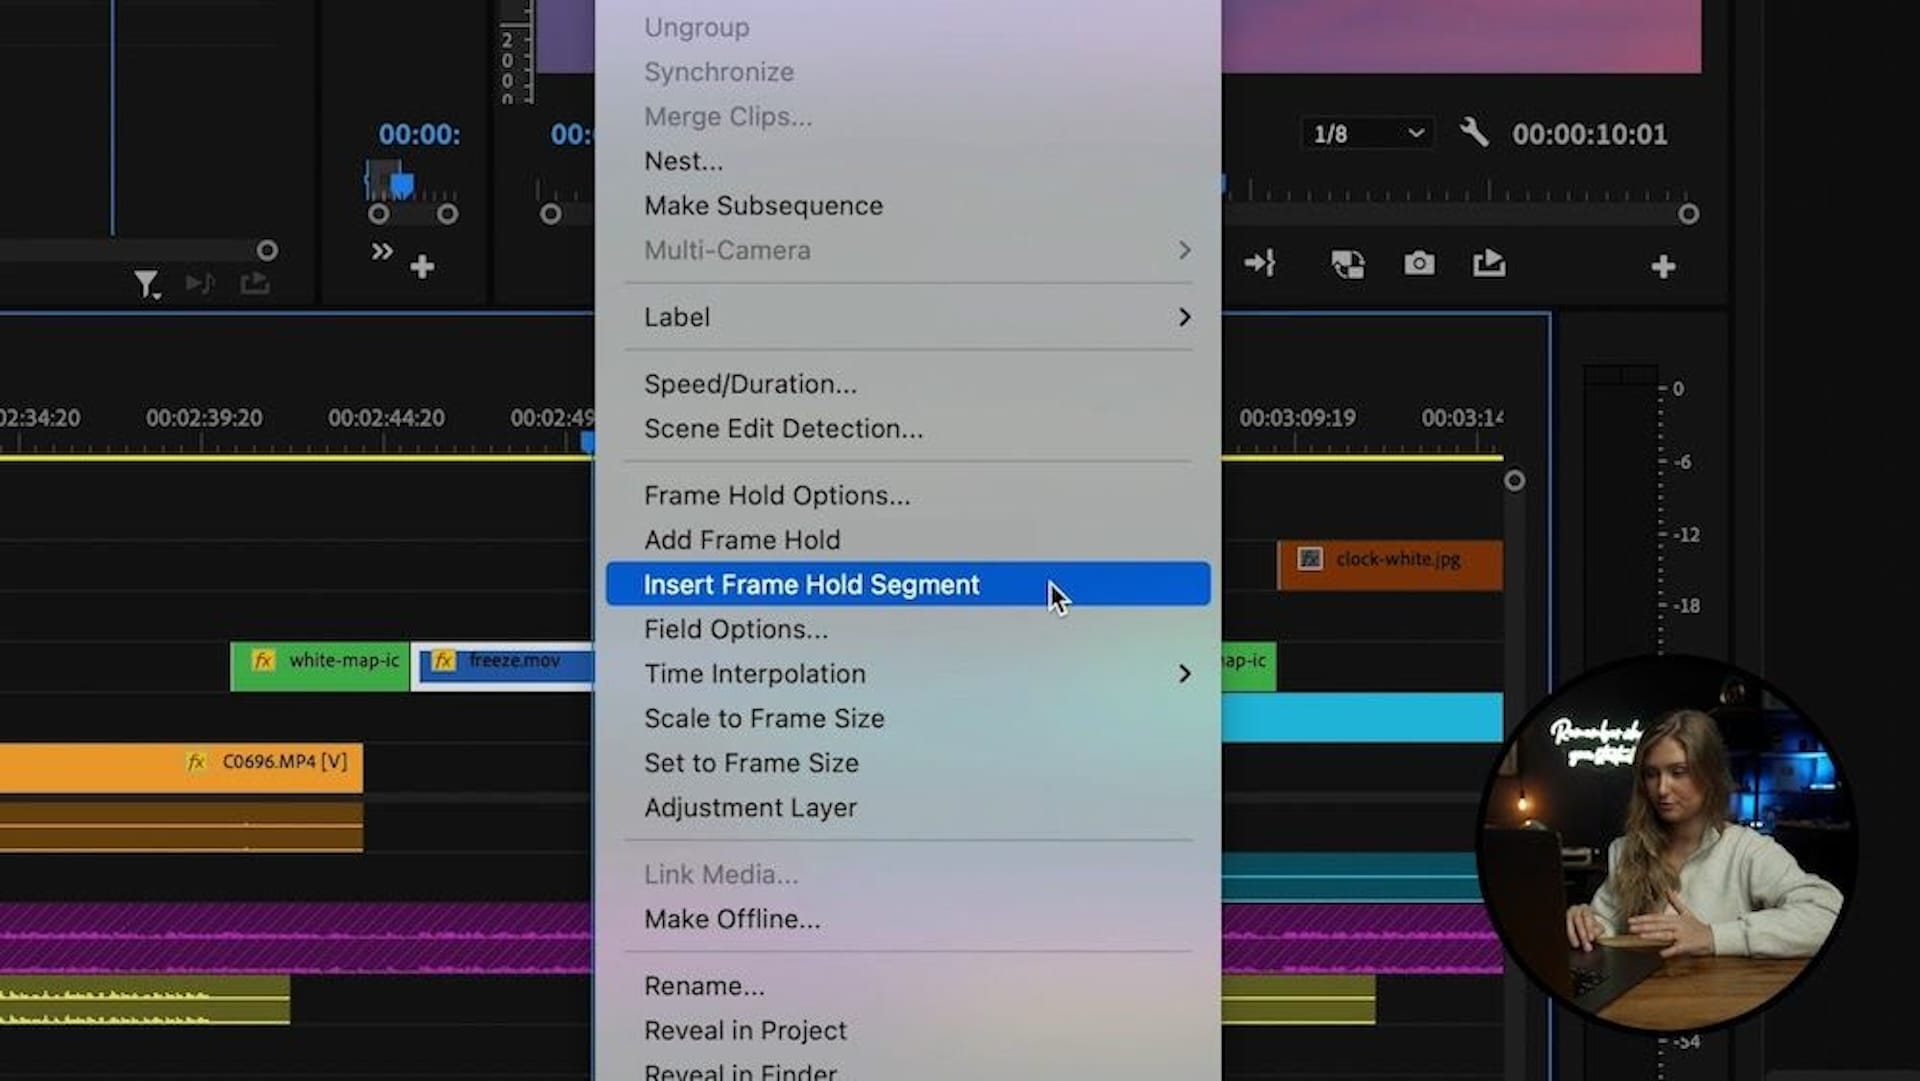
‘Freeze’ is great if you want to, well, freeze a frame. Usually, you do this because you want to emphasize a certain moment. So, for example, I've got this clip I'm working on of this guy on a motorcycle doing crazy flips in the air, so obviously, I want to highlight when he's entirely upside down.
All you have to do is move your play head to the moment you want to freeze and then right-click. You’ll notice that there are a few different options to choose between. There is ‘Frame Hold,’ ‘Add Frame Hold,’ and ‘Insert Frame Hold Segment.’ Personally, I like to use ‘Insert Frame Hold Segment’ because it not only freezes the frame but it also adds its own clip for you right in between the cut.
Tip #2: Premiere Pro Crop video
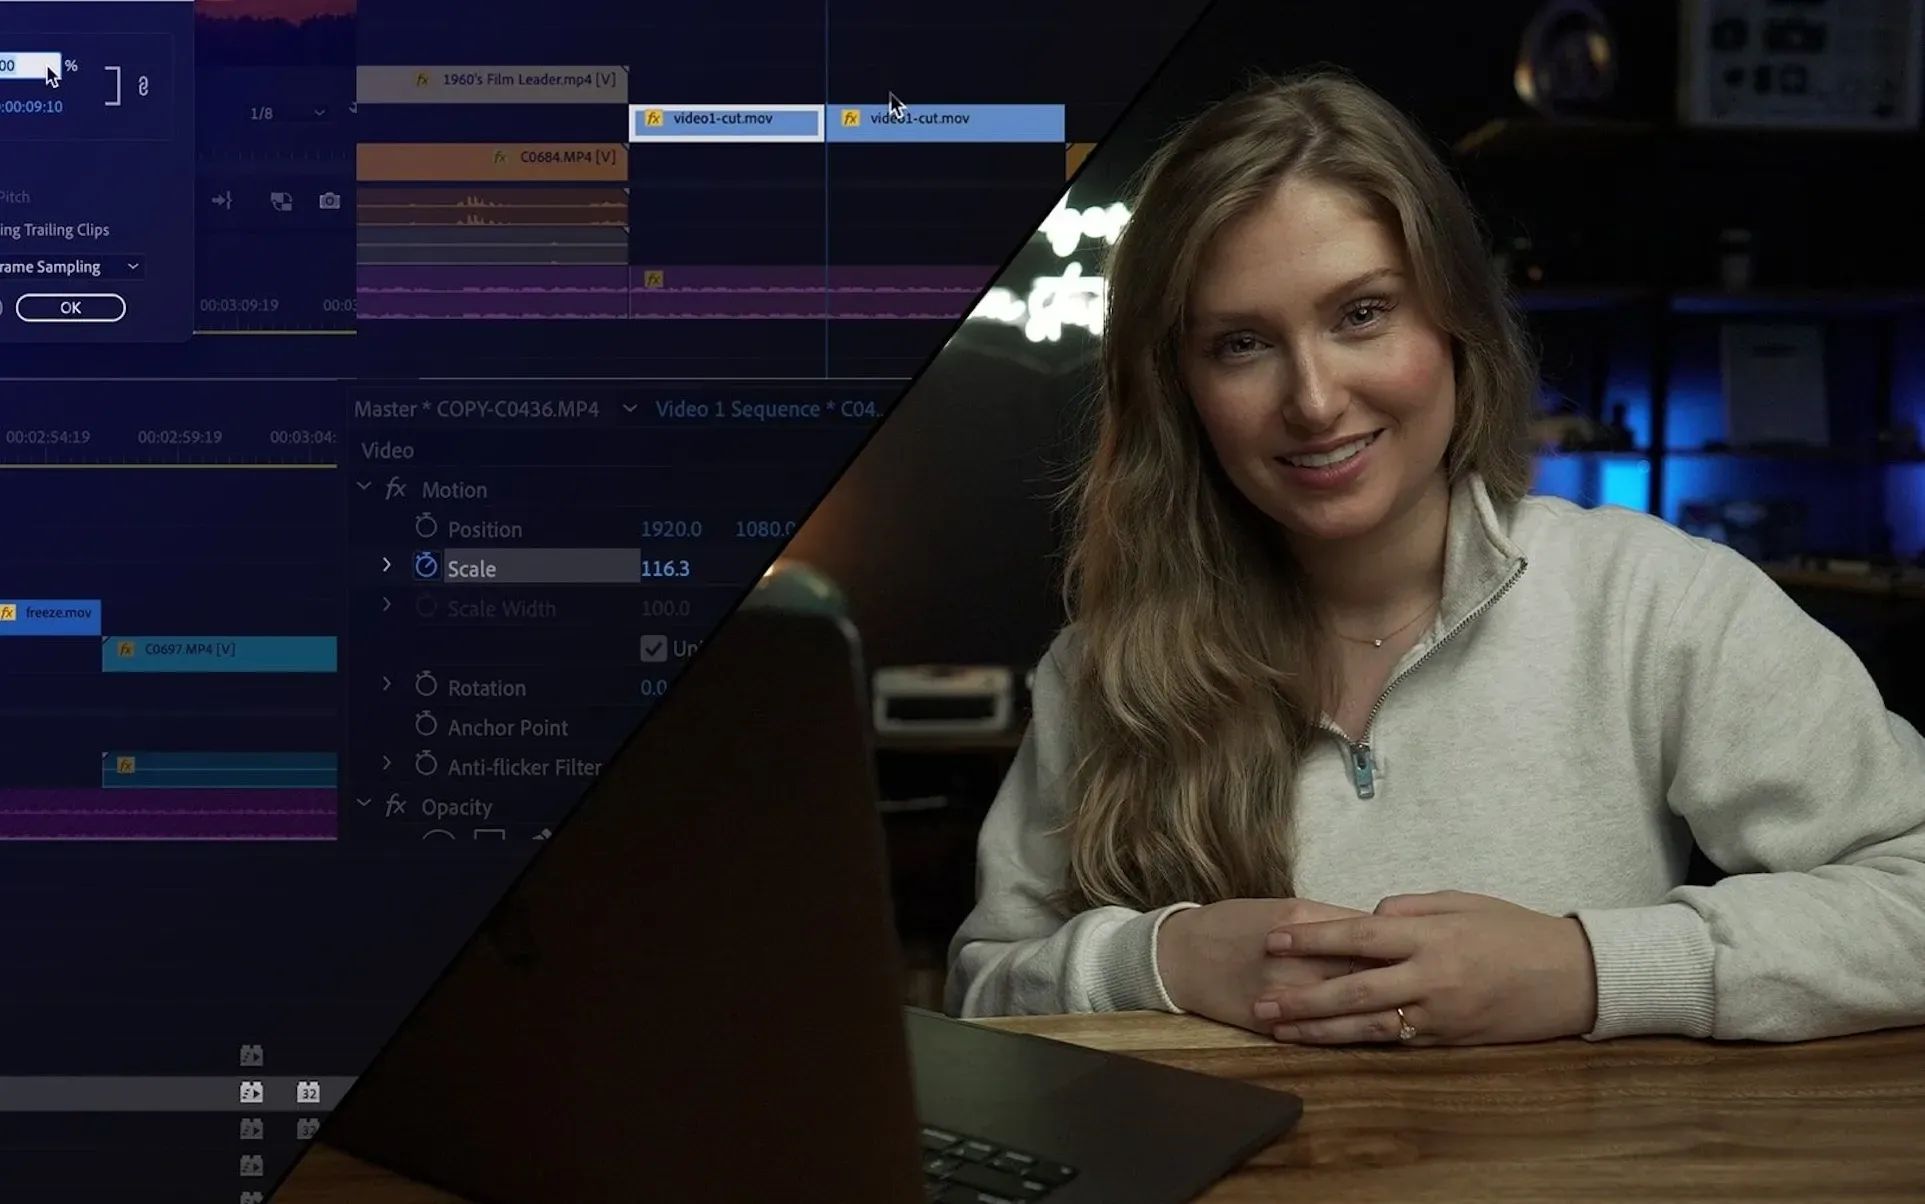
This tip can be handy when you want to adjust your footage afterward. For example, when you have filmed really wide footage to make sure to catch everything, but then realize afterward that certain space can be cropped out of that footage.
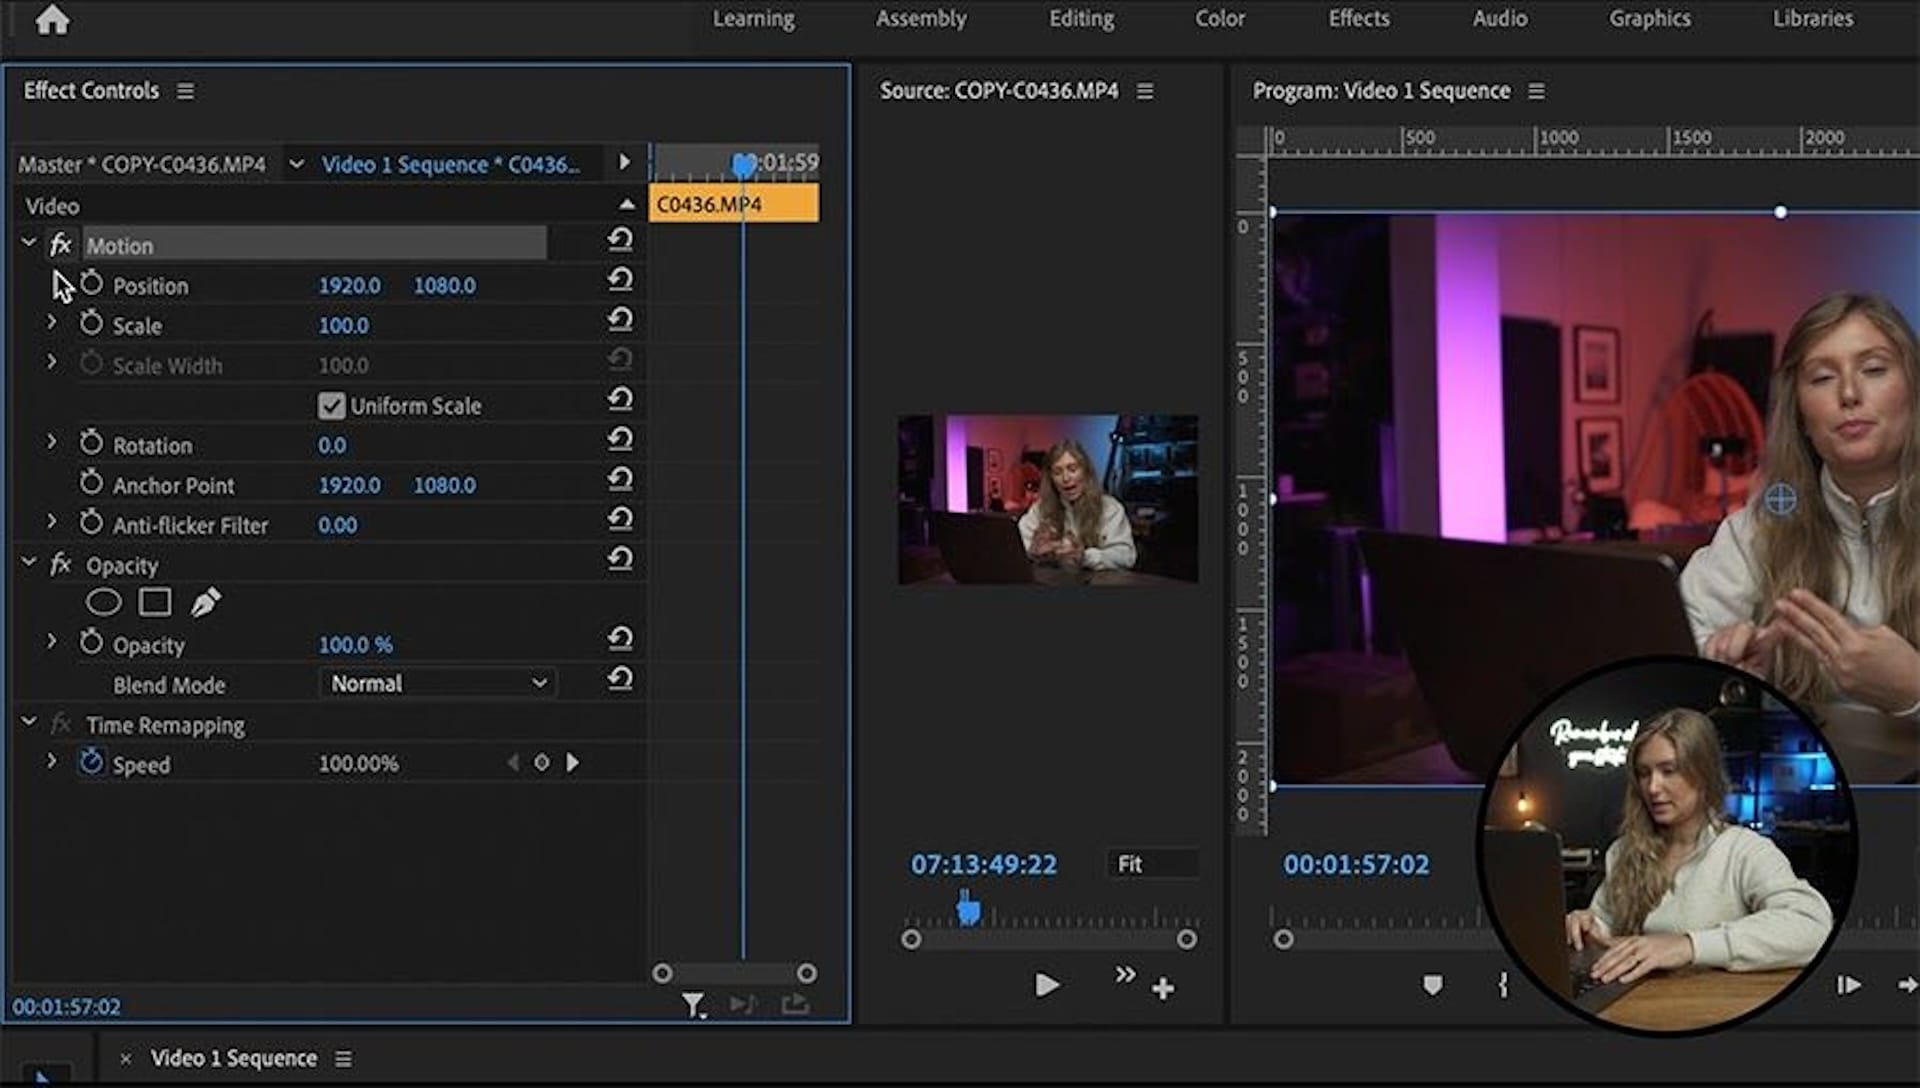
So, if you want to crop some of your footage, open your Premiere Pro and go to the top left panel and click on ‘Effect Controls.’ Make sure you have the clip you want to crop selected. Click the ‘Motion’ drop-down, and next to ‘Scale,’ you can click, drag and adjust to whatever crop you'd like.
Remember that when you scale into the footage, you are losing pixels – but luckily, Adobe Premiere Pro handles scaling very elegantly and tends to preserve the quality whenever possible. So if you're working in a 10:80 timeline, for example, you've got lots of space to crop in. Cropping is also the first step to a digital zoom effect, so just by adding in a few keyframes, you can add some movement to your originally static frame.
Tip #3: Premiere Pro Reverse video
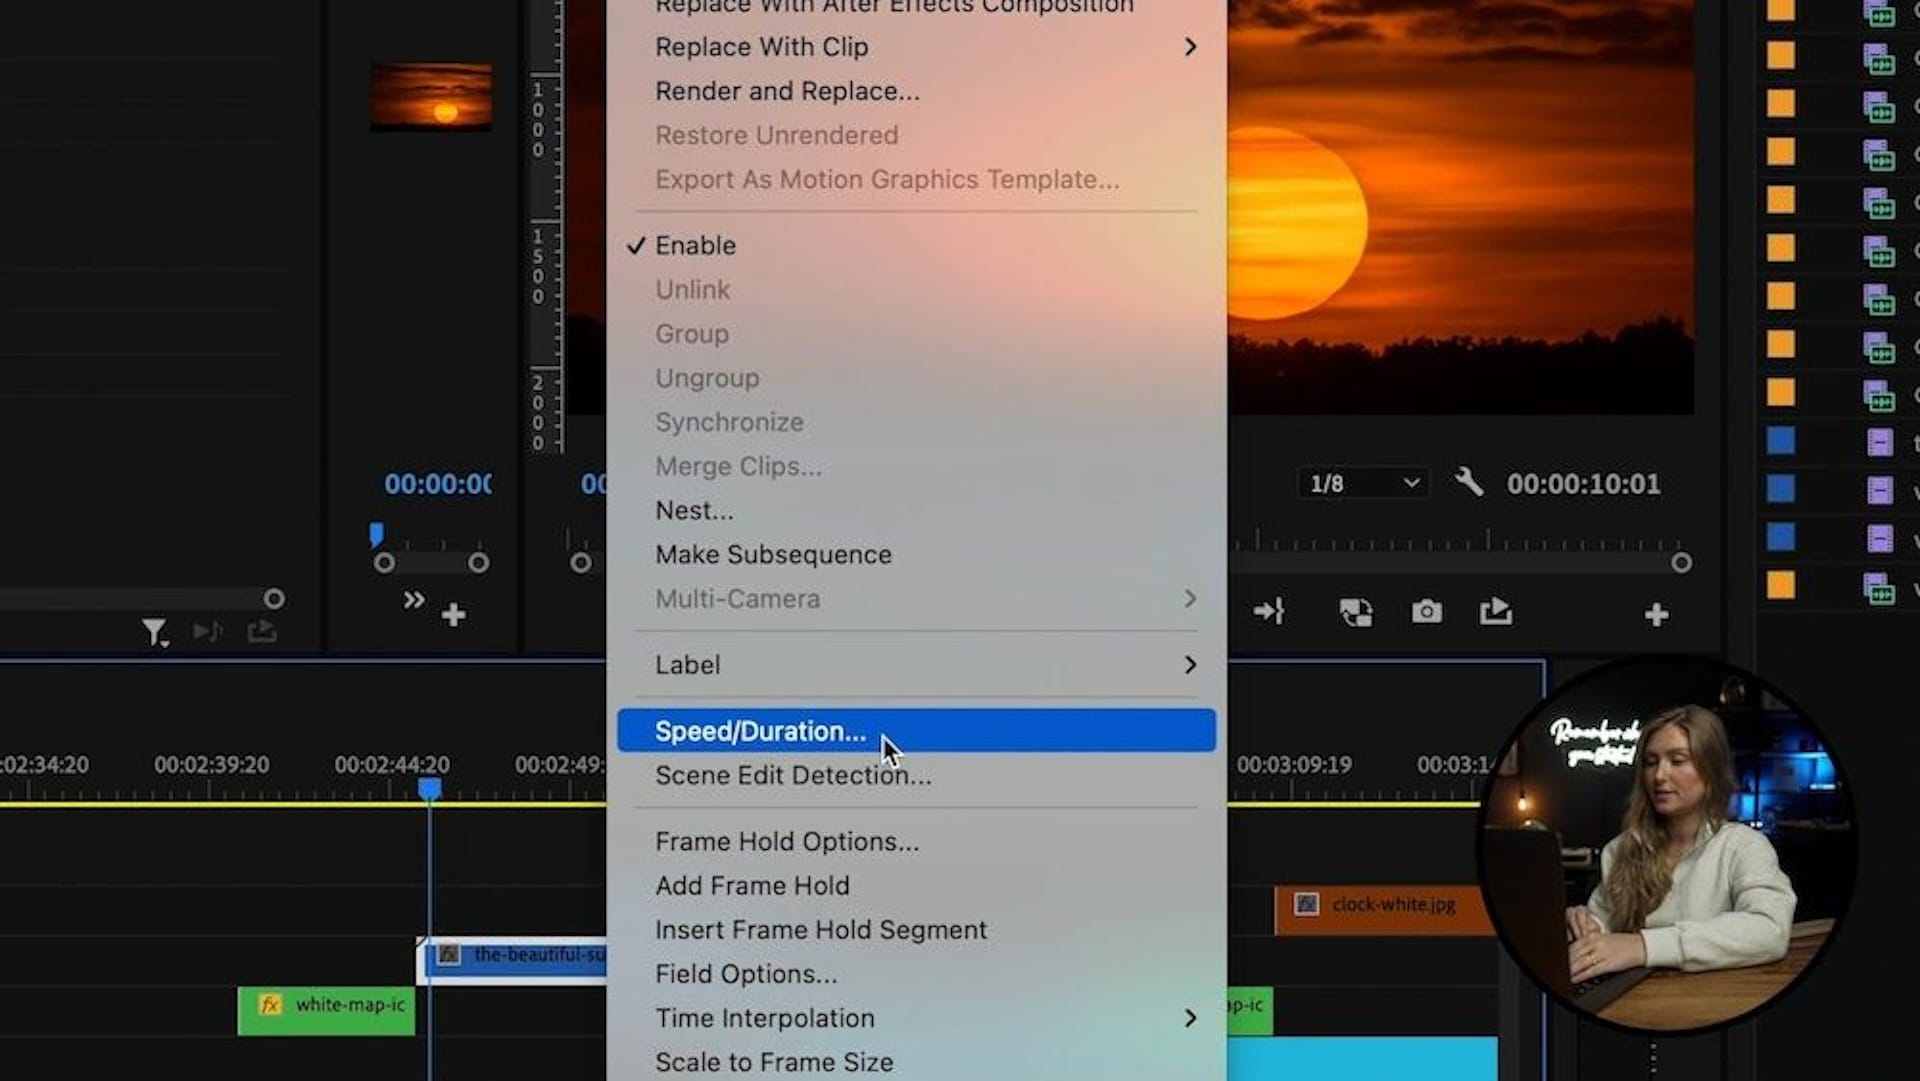
Reversing could be something you do as a special effect, or perhaps you just want to change the direction of a focus pull. Regardless, it’s a super easy change to make. To do this, right-click on your clip in the timeline and then click on ‘Speed Duration’, which is also in the timeline. That’s where you’ll adjust the speed of the clip, if you want to. You can also set the speed to a custom length, or you can of course reverse the speed. So, click on the box next to ‘Reverse Speed,’ and that’s it – your clip is reversed!
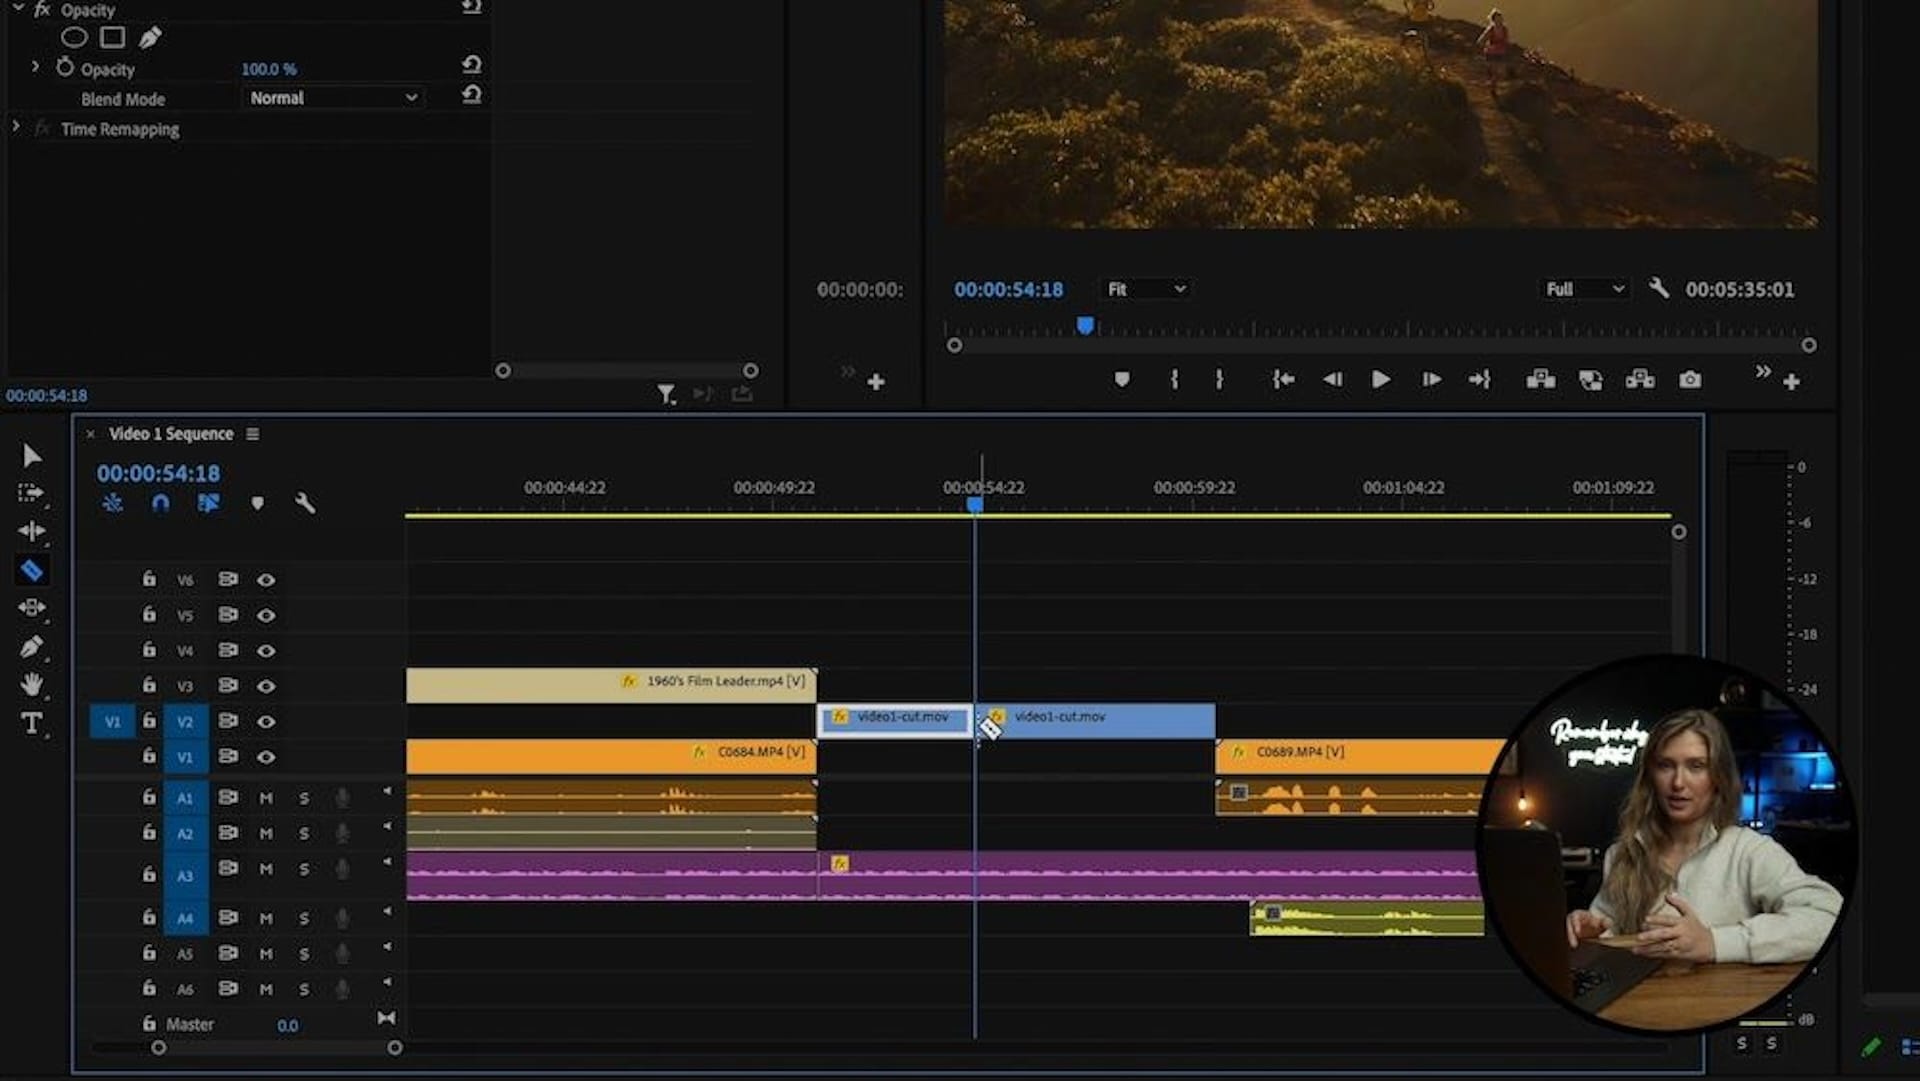
Tip #4: Premiere Pro Cut shortcut
Cutting is one of the most basic of the basics when it comes to editing, and there are a few different ways to cut.
Your first option is the ‘Razor Tool.’ You can either click on the razor in the left panel or hit the shortcut C; this is what I usually use. Your second option is to use ‘Add Edit.’ The default setting on the keyboard shortcut is Command + K. ‘Add Edit’ is actually my personal favorite because then you don’t have to change between the razor tool and the mouse tool constantly. ‘Add Edit’ is also just one simple click, and you can make a cut.
You also have a third option, ‘Ripple Trim,’ but this only works in certain scenarios. To use this option, drag your mouse to where you want to make the cut in your video and hit the ‘Ripple Trim’ shortcut. This will not only make the cut, but it will also snap the rest of your timeline back to the clip before it. A good thing to note is that all of these cutting options also work on audio. This means you can use any of these effects on your snazzy Epidemic Sound tracks as well.
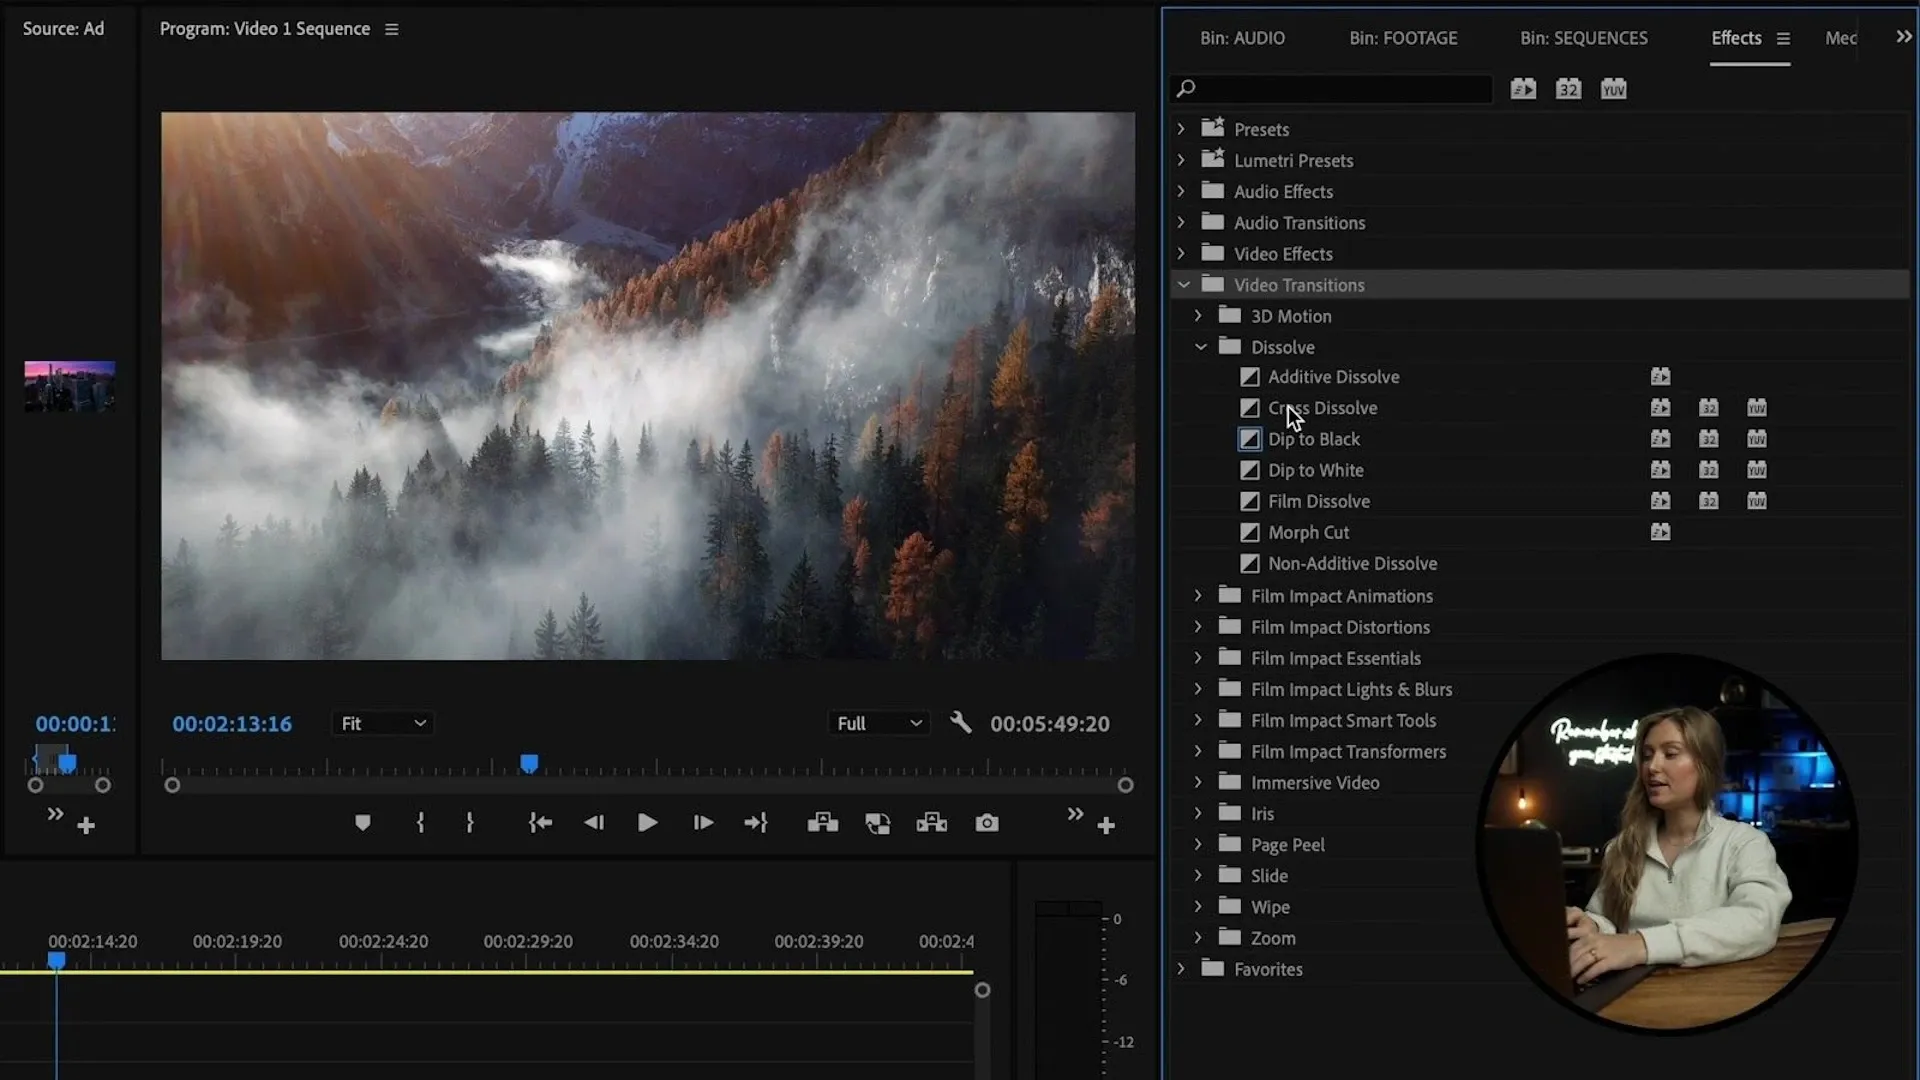
Tip #5: Premiere Pro transitions
This effect is a bit of a bonus if you like to get creative. When you click on the effects panel, you’ll see an ‘Audio Transitions’ drop-down menu as well as a ‘Video Transitions’ menu. What you can do then is select the transition you like and drag it into your timeline, between the two clips you’d like to make a transition for. However, if you want to save time and use a shortcut, do the following instead:
Choose a transition, like ‘Cross Desolve’ for example, and instead of opening it up in the effects panel, all you have to do is select the clips you want to add the transition to, and then hit Command D. Then, it automatically adds the transition to the clips.
If you want to change the transition that is your default, all you have to do is right-click on the effect you like and click ‘Set Selected as Default Transition.’ If you want to change the duration of the default transition, click ‘Premiere Pro,’ ‘Preferences,’ ‘Timeline,’ and you can set the duration at the top.
I hope you got some nice editing inspiration for your next project, and don’t forget to keep an eye out for the next blog post to go live, in which I will go into depth on how to work with stock motion graphics templates from Adobe Stock.
Creator's Lab is an educational series co-produced by Adobe Stock and Epidemic Sound, aiming to provide tips and tricks to storytellers to help them bring their video content to the next level.
Lizzie Peirce is an Epidemic Sound ambassador and pro-content creator from Toronto. Lizzie is also running a production company together with her fiancé Chris Hau, who is a successful content creator as well.
Want to use top-tier music in your next video but haven't got a subscription? Sign up below.

Are you a video editor or filmmaker? Whether you’re an absolute master or just a beginner, discover what Epidemic Sound has to offer on our Epidemic Sound for Filmmaking page. Oh, and if you’re looking for some background music for your videos, we got you covered.
Related posts: