5 Adobe Premiere Pro transition effects you can try today
Learn how to create 5 simple, eye-popping transition effects with Adobe Premiere Pro, Epidemic Sound and Herman Huang.

When you first start editing video, the results might feel flatter than you’d like – especially when it comes to fast-paced, short-form content. Transitions can spice up your edit, and can be used for everything from music videos to travel vlogs, recap videos to sport montages.
Check out our video with Herman Huang below, where he discusses how to nail transitions with Adobe Premiere Pro and Epidemic Sound. Then, keep reading to learn how to create 5 simple, eye-popping transition effects with Premiere Pro!
How can you add transitions to Premiere Pro?
There are several ways to add transitions to your content in Premiere Pro. Today, we’ll cover:
- Flicker
- Overlays
- Digital Whip Pan
- Invert Color Flash
- Glitch Transition
#1: Flicker
The flicker effect is one of the easiest Premiere Pro transitions – all we have to do is cut away a few frames between the two shots we're using to transition. Those gaps between the clips will create a flickering visual that adds extra intensity to our content.
#2: Overlays
Using ready-made overlays is a simple, super speedy method to add style to videos. A little bit of lens flare or light leaks go a long way – here’s how to access Premiere Pro overlays.
1. Let’s check out Adobe Stock’s ‘Videos’ collection and type ‘Light Leak Transition’ into the search bar.
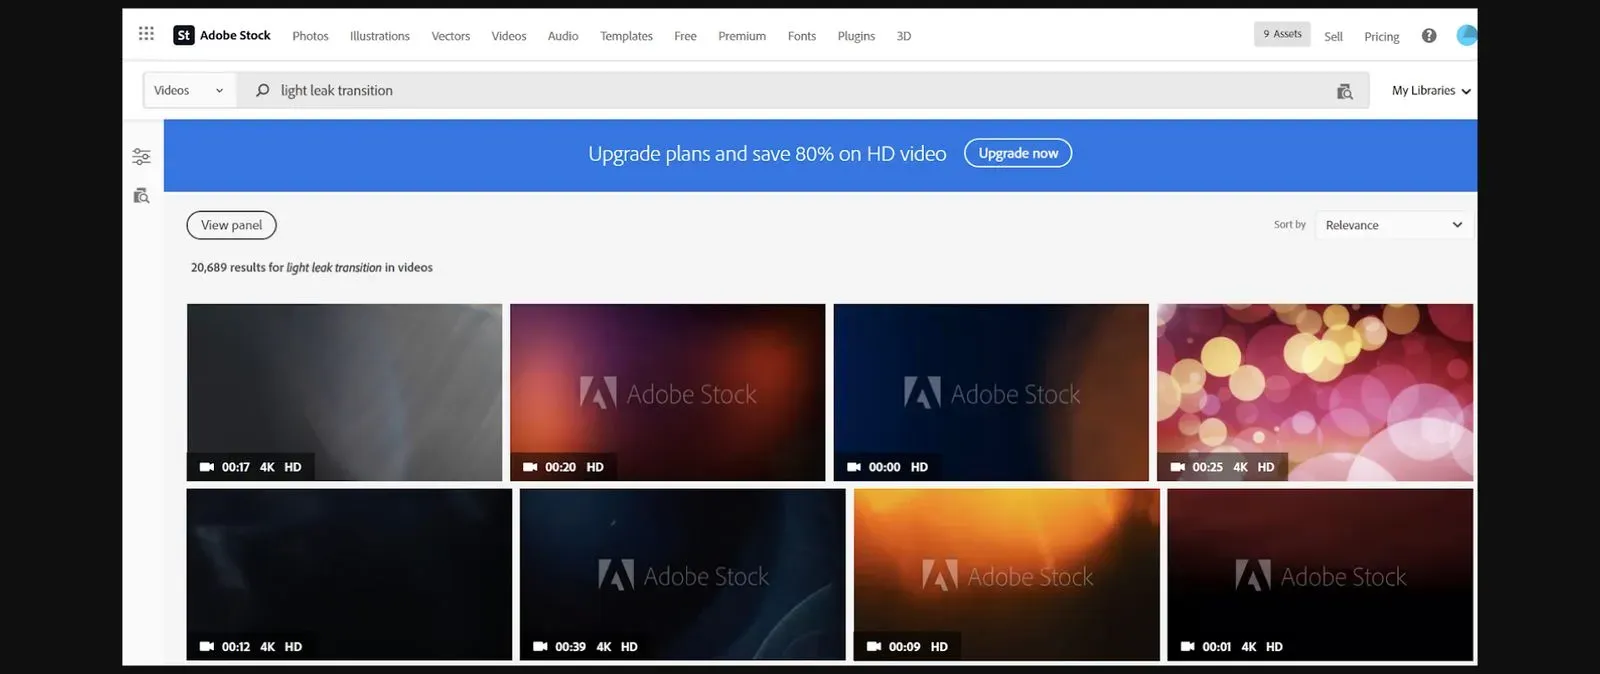
2. As you can see, there are a bunch to choose from. Let’s go with the below.
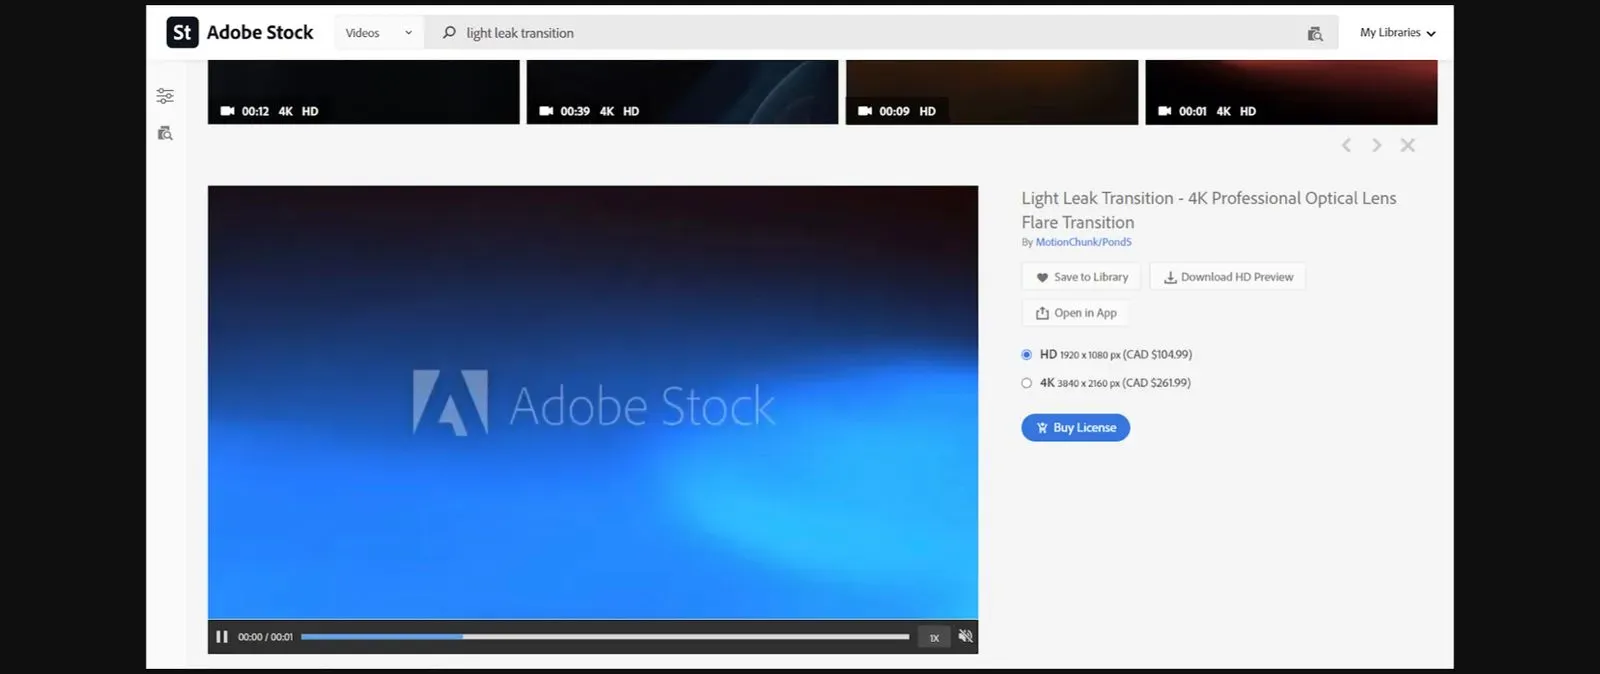
3. We can try the overlay directly in our edit by pressing the ‘Open in App’ button. Assuming we already have our Premiere Pro project open, the overlay will open there.
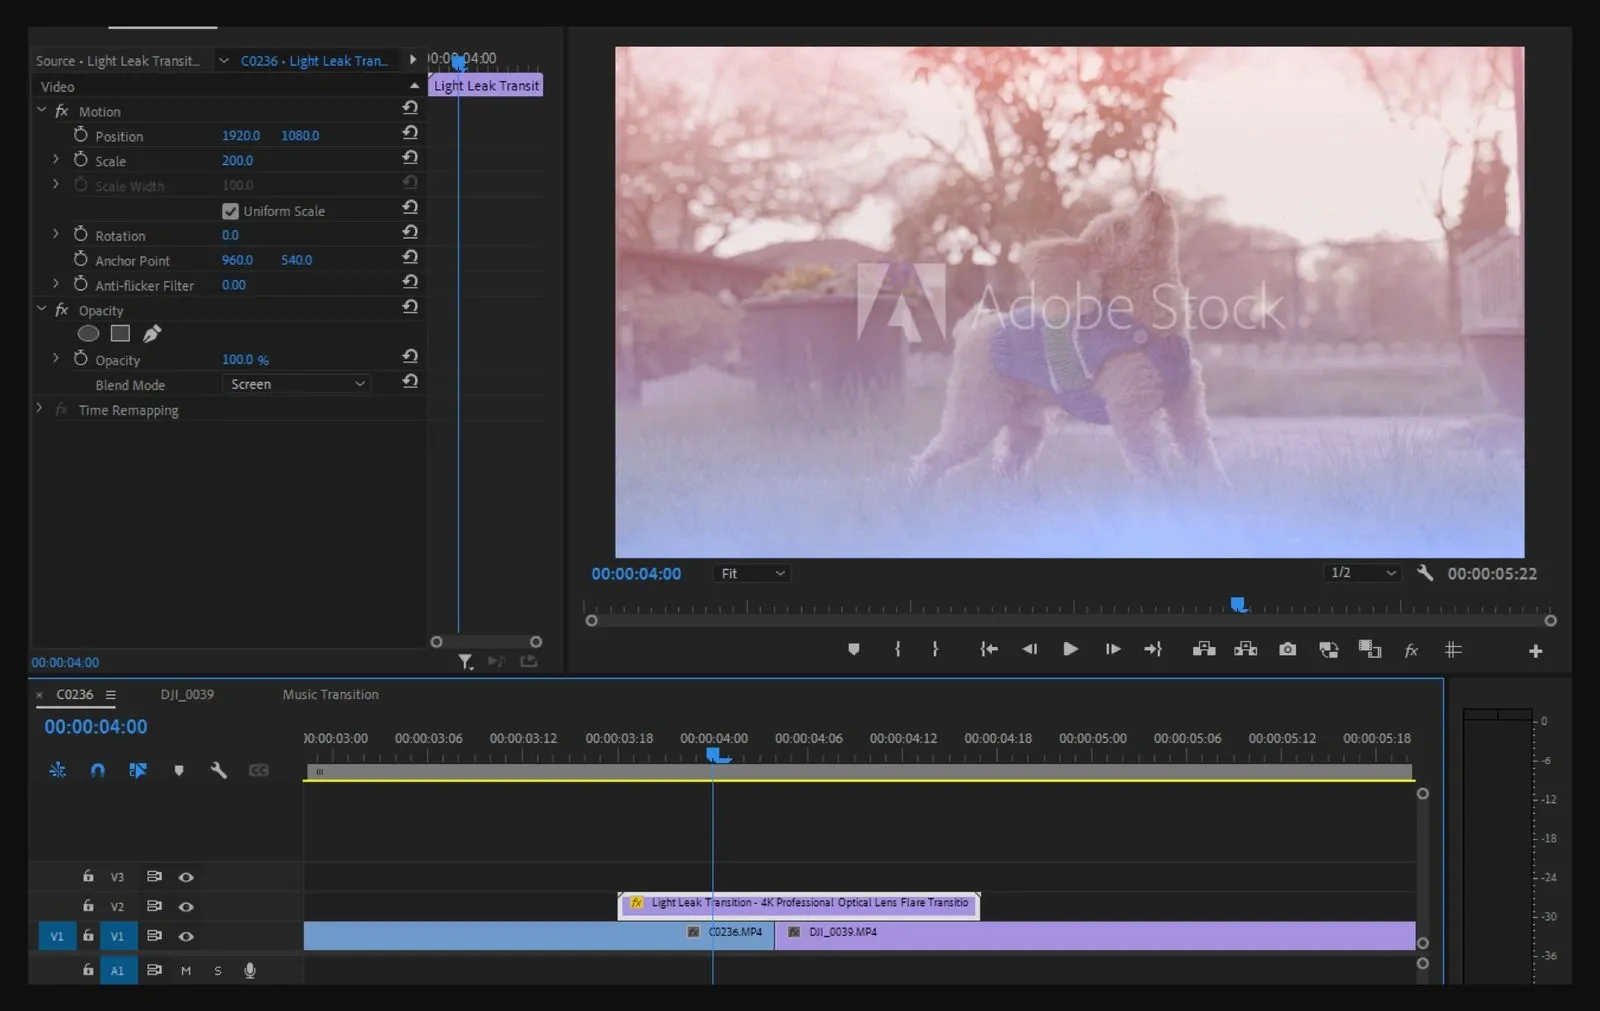
4. Let’s place this light leak clip on top of the clips we want to transition between. Next, we just change the blending mode to ‘Screen,’ and we’ve got ourselves a stylish, oven-ready Premiere Pro transition.
5. If we like the effect, we can buy it directly in Premiere Pro. Simply click the shopping cart icon next to the effect and purchase it using Adobe Stock credits.
#3: Digital Whip Pan
A whip pan is another great Premiere Pro transition that’s usually done in-camera – it involves the camera whipping back and forth, creating a blurry effect. You can nail it in Premiere Pro by following the below steps.
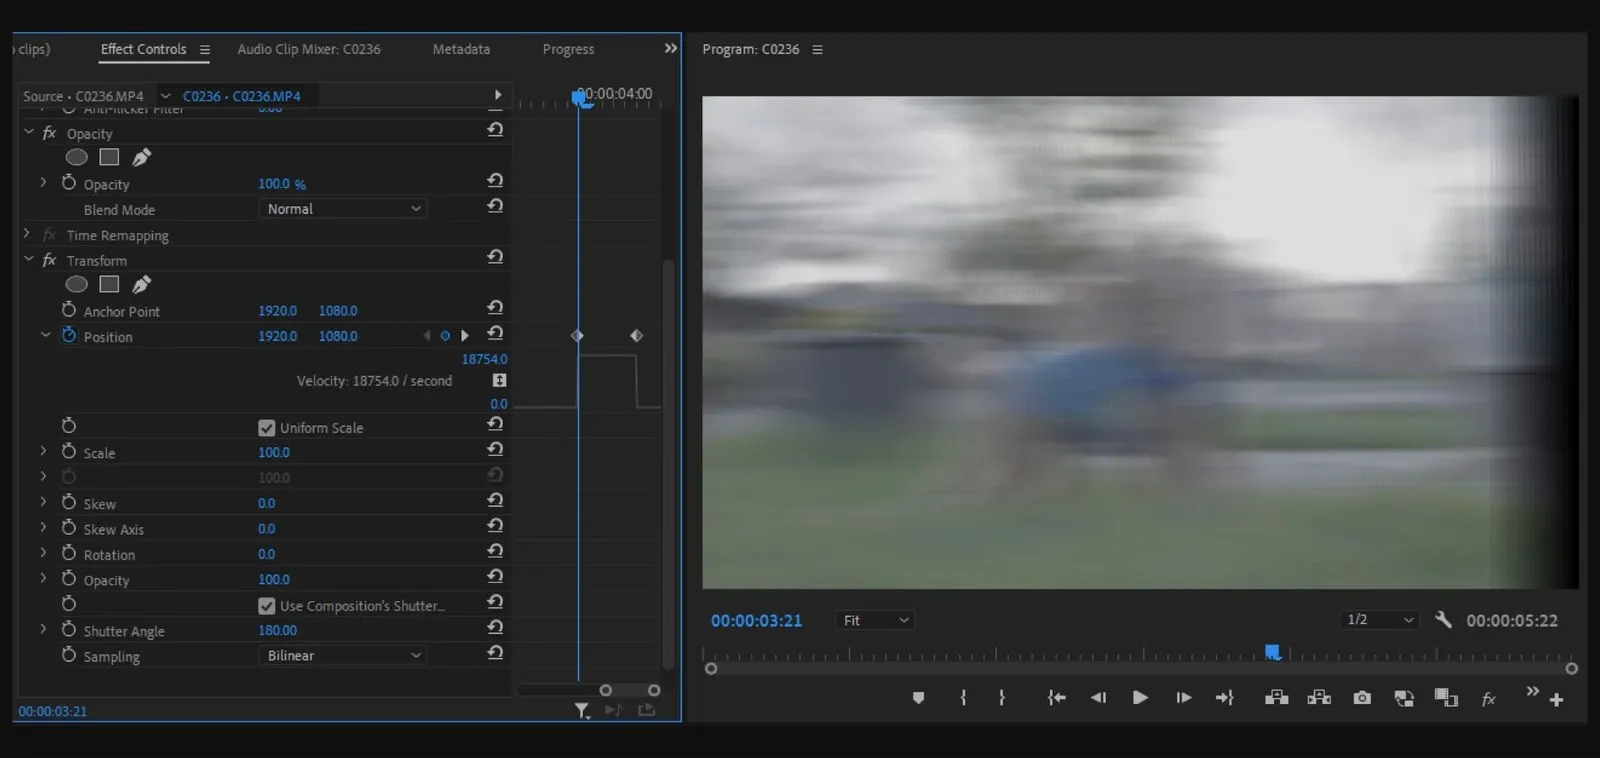
1. Apply the ‘Transform’ effect by looking it up in the ‘Effects’ panel. Next, we’ll drag the effect over to both of our clips.
2. We’ll select the first clip and head to the ‘Effects Control’ panel. Once there, we’ll look for our ‘Transform’ effect from the previous step.
3. We need to adjust the ‘Position’ of our video by keyframing it. Keyframes are basically start and end points on the project timeline, telling our video what to do at which point. To add a keyframe to our position, we just click the stopwatch icon next to ‘Position.’ We want the video to stay in frame, so we won’t change the position values yet. Let’s move the playhead forward, closer to the end of our first clip. Now, we can adjust the position value so that the clip is completely out of frame. If we play it back, the clip starts in frame, but then moves completely away.
4. Introduce some motion blur by changing the 'Shutter Angle’ value to something like 180. We should get a blur going like below.
5. Next, we place the second shot on top of the first clip so it overlaps a little. We keyframe this position as we did previously, ensuring the shot enters the frame in the same direction. We’ll change the ‘Shutter Angle’ here, too – like in the previous step – so there’s some motion blur to glue it all together.
6. If the movement feels too sharp, we can solve that. Just hit the arrow under ‘Position’ and ease the keyframes by dragging the handles. Doing this to both clips will smoothen the motion and deliver a top-tier Premiere Pro transition.
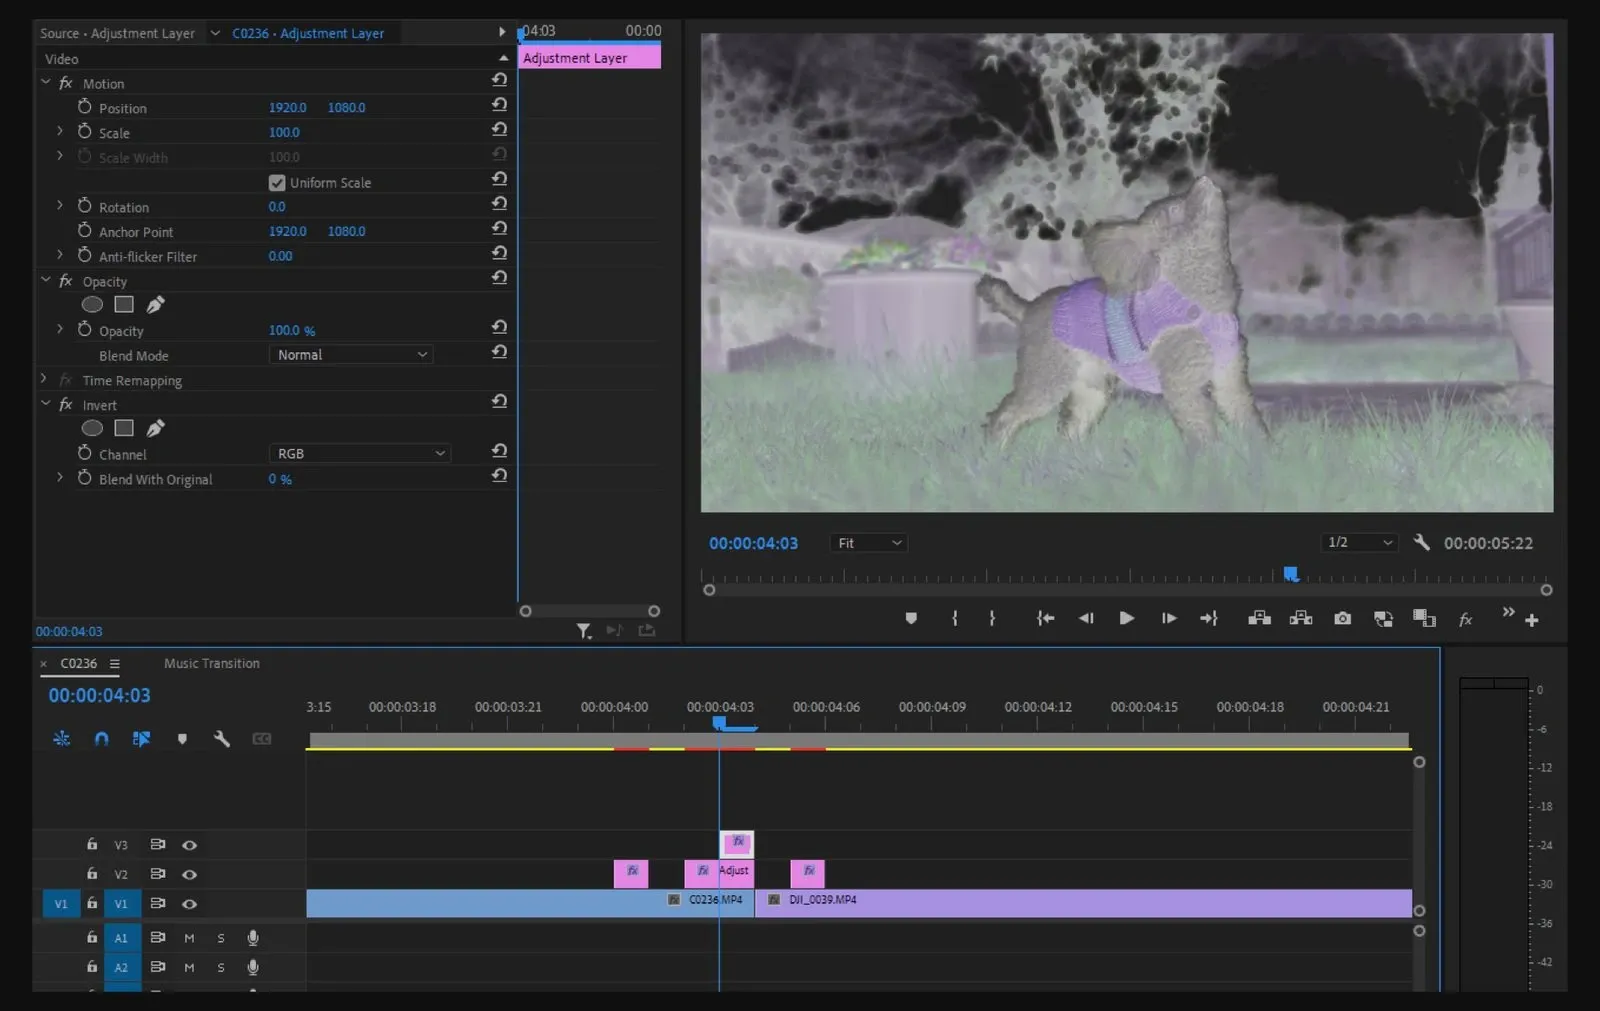
#4: Invert Color Flash
This next one is a fun, vibrant effect that uses adjustment layers to alter our sequence. Here’s all you need to know about the invert color flash transition for Premiere Pro.
1. Let’s start by creating a new adjustment layer. We do this by clicking the ‘New Item’ icon, going to ‘Adjustment Layer’ and clicking ‘OK.’
2. We drag the layer over our sequence and trim it to a reasonable length. For example, the transition doesn’t need to last for the entirety of both clips – a second or two on either side will be fine.
3. We need to duplicate the adjustment layer. This is done by holding ‘Alt’ on a PC or ‘Option' on a Mac, then dragging the layer one track above.
4. Next, let’s trim the top adjustment layer, so it only lasts one frame at the end of clip one.
5. Now we’re ready to add some effects. Head over to the ‘Effects’ panel, look up ‘Color Balance (HLS)’ and drag that over the bottom adjustment layer.
6. We’ll keyframe the ‘Hue’ so it continues to change color throughout the adjustment layer’s duration. How long it lasts depends on the desired effect – we can even chop some frames out of the layer so the color flashes in and out, almost like the flickering of a faulty light.
7. Finally, we’ll drop in an ‘Invert’ effect from the ‘Effects’ panel. This should sit on our top adjustment layer – the one that lasts for just one frame. Play the clip back, and we should have achieved a juicy, eye-popping invert color flash.
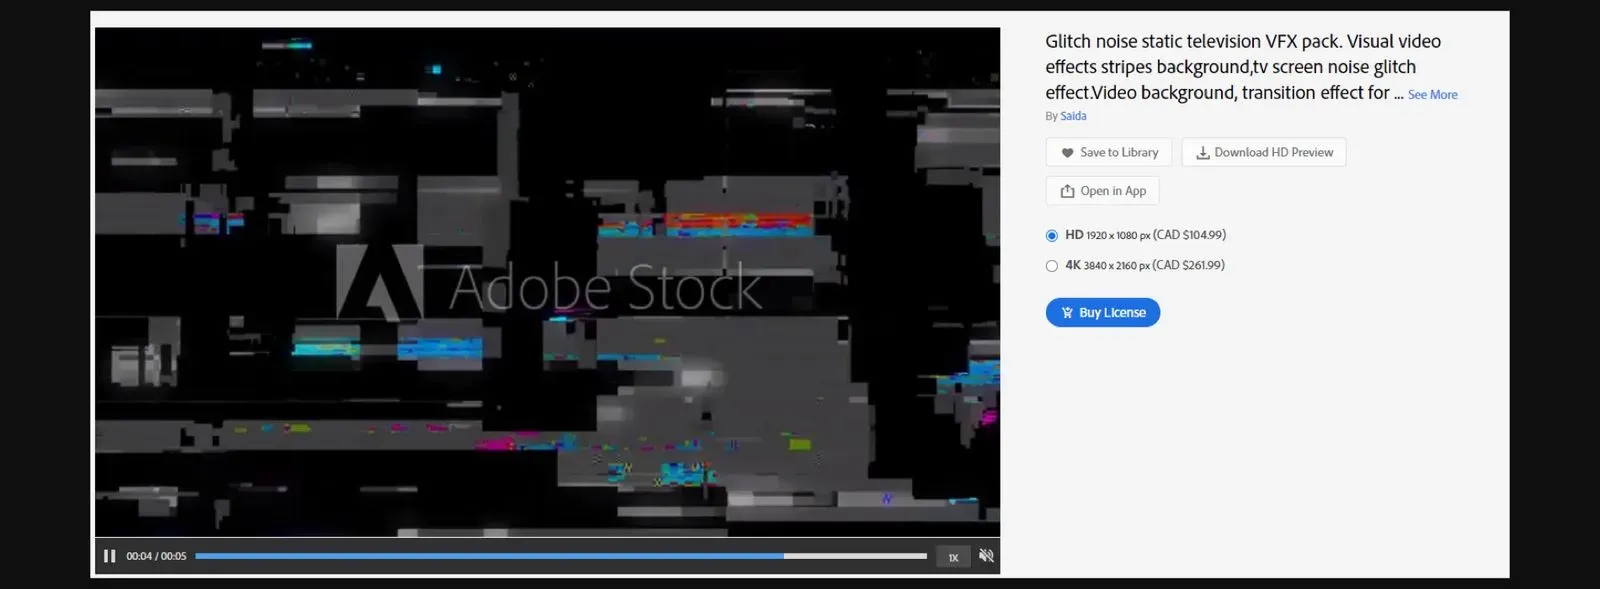
#5: Glitch Transition
The last Premiere Pro transition we’re covering today is the glitch, which can be achieved with Adobe Stock. Check out how to do that below.
1. Let’s search Adobe Stock’s selection of videos again. Instead of ‘Light Leak Transition,’ let’s go for ‘Glitch Transition’ this time. Just like before, we’re spoiled for choice. Let’s choose this one.
2. Open the effect in-app like before, so we can test how it looks in the edit straight away. We can play with the blending mode and use this clip as an overlay if we want. Another thing we can try is using this clip as a track matte. Track matte is a layering effect: one clip reveals another, using a third visual to do so.
3. Position the layers so the first clip overlaps the second, then trim the glitch footage to a short duration that covers the interaction between both clips.
4. Apply the ‘Track Matte Key’ from the ‘Effects’ panel and drag it over the first clip. Change the ‘Matte’ to the video layer featuring our glitch effect. We’ll then set the ‘Composite Using’ to ‘Matte Luma.’
5. If the clip disappears, we just need to hit the ‘Reverse’ box. Our clip should flicker and glitch from the first shot into the second.
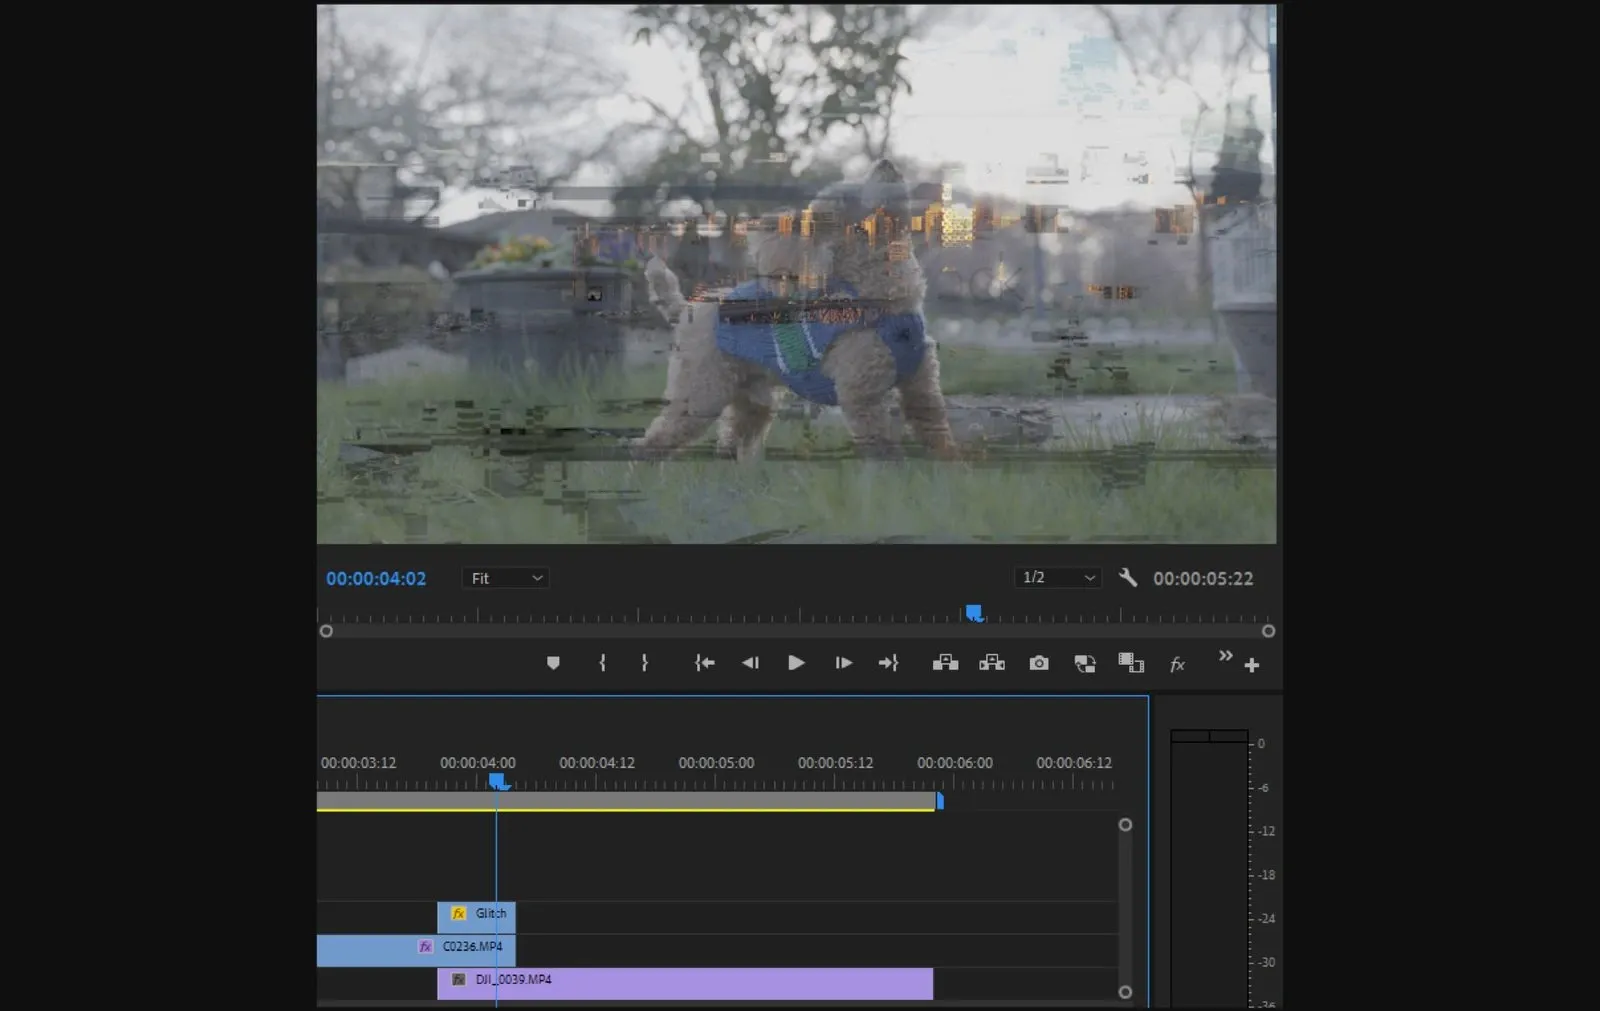
6. We can even use our glitch clip as an overlay by duplicating it, using a different section of the clip and changing the blending mode to something like ‘Screen.’ We can play around, experiment and come up with a bunch of cool Premiere Pro transitions with the glitch overlay.

7. Just like before, we can buy the overlay directly in Premiere Pro. Click the shopping cart icon next to the effect and purchase it using Adobe Stock credits.
If you’re looking to enhance your transitions even further, you should consider adding a proper soundtrack. After all, bad music kills good video.
Thankfully, Adobe Stock audio makes it easy to find the perfect track; it’s integrated within Premiere Pro, so you don’t even have to leave your project to find what you need. You can explore massive music catalogs including Epidemic Sound, which has more than 50,000 tracks and 200,000 unique sound effects and variationss. Check it out and make your Premiere Pro transitions hit that extra bit more.

Related posts: