How to get the volume right in your videos
In this blog post, Ben Hess – in collaboration with Epidemic Sound and Adobe Stock – will help you to get your audio volume just right.

Do you often find yourself struggling with deciding how loud the music should be in your videos? In this blog post, Ben Hess – in collaboration with Epidemic Sound and Adobe Stock – will help you to get it just right.
For such a long time, I struggled with figuring out how loud my music and dialogues should be when editing videos. Sometimes everything would be too quiet, and other times it would be way too loud so that you couldn't hear the dialogue happening at all.
Tips for nailing the volume in your videos
Luckily, over the years, I've learned a few tips and tricks that should help you get the perfect levels for your videos. The main thing to understand with audio is that it’s like a box. There's only so much audio you can add in before it starts to clip and sound distorted. If you're looking at your audio meters and it's continuously hitting 0dB and lighting up red, that means you hit the limit, and your audio is starting to distort. In other words, the box is full.
Make sure to balance your audio
Try to steer clear from hitting the red part as much as possible. More specifically, you’d want to stay a little bit below it. A good rule of thumb is to keep your entire project with all the audio under -6dB. Louder isn't always better; it’s rather about balancing your dialogue, music, and sound effects.
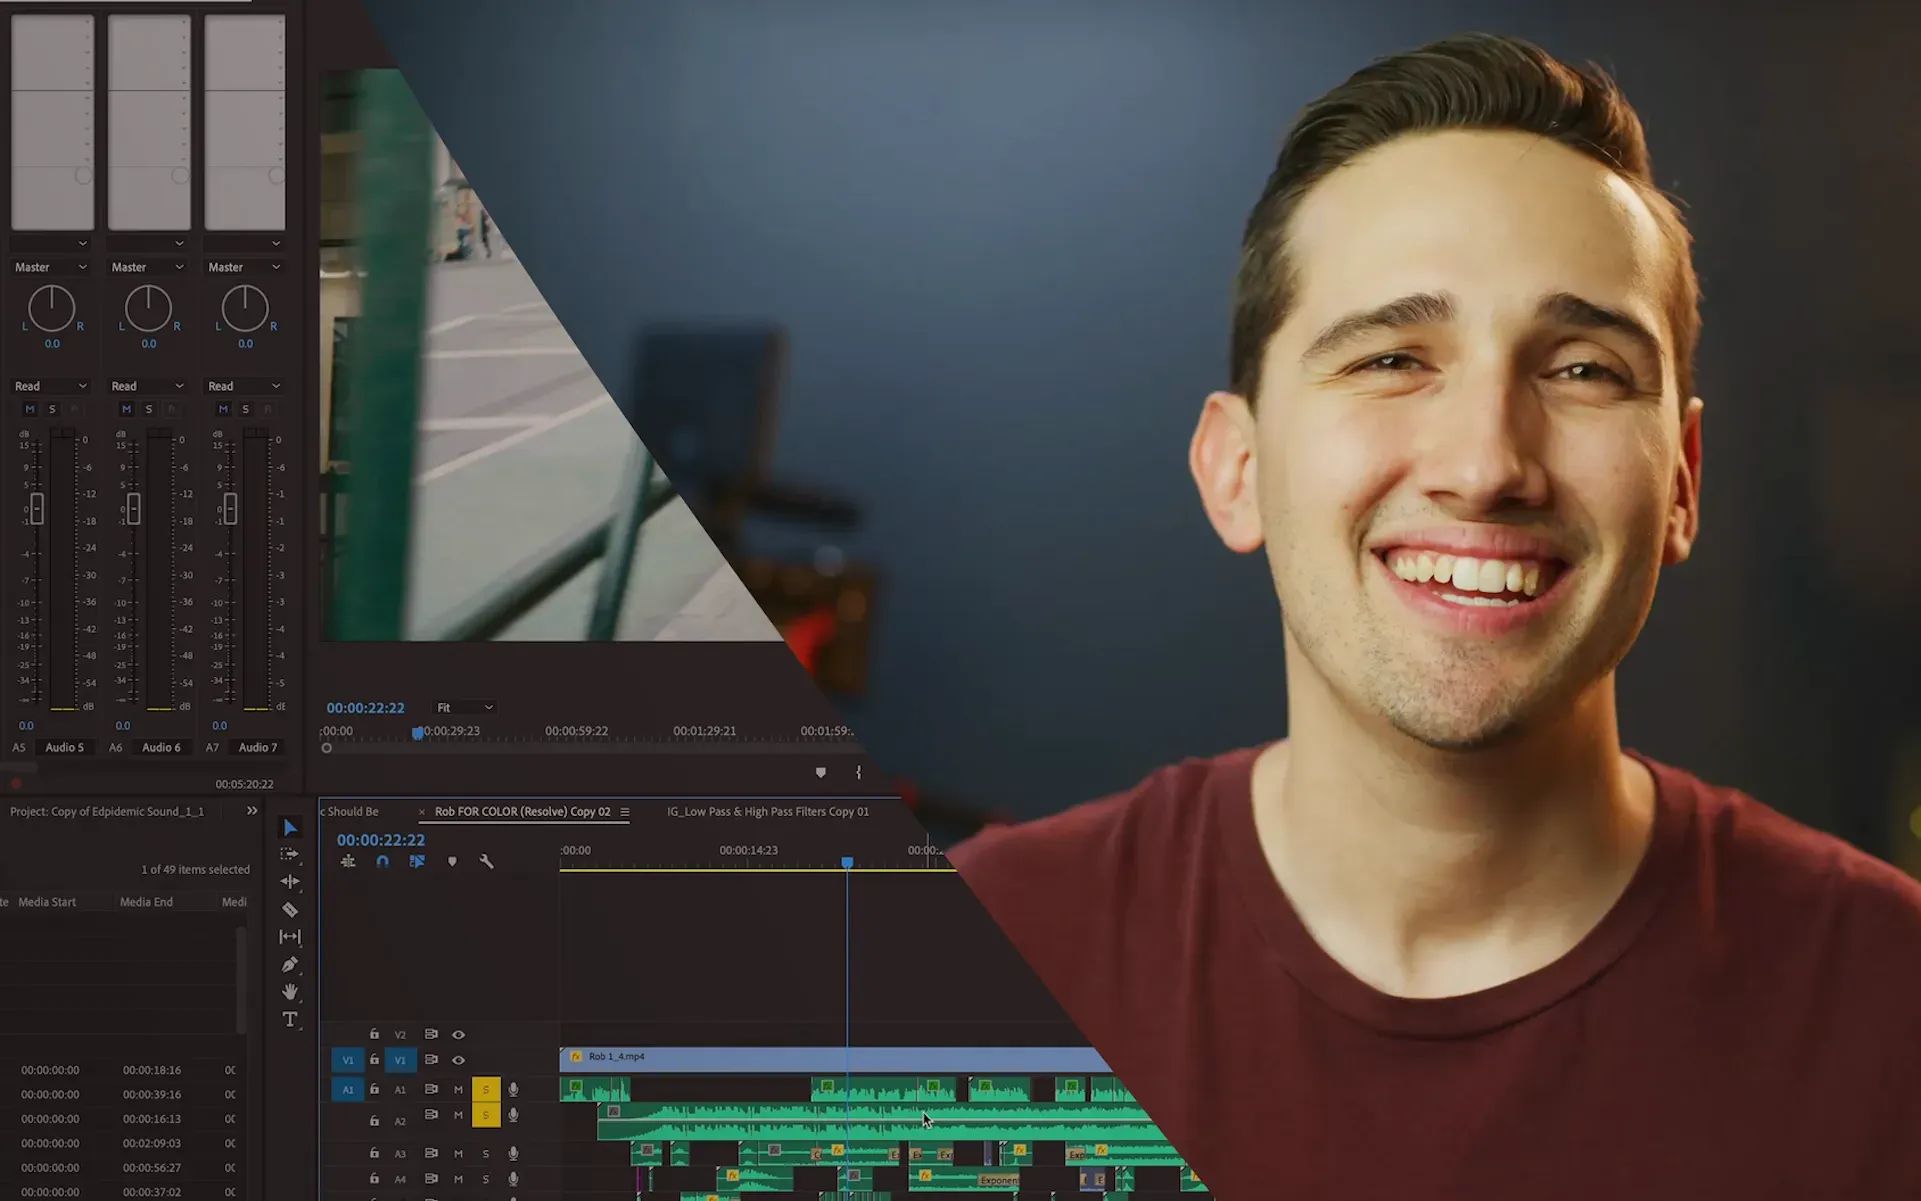
Now, when it comes to setting proper music levels in your films, the answer is pretty simple. Set your dialogue and adjust the music accordingly. Aim to have your dialogue at around -12dB and adjust the volume, so it averages around there. Using the audio track mixer in Premiere Pro, you can see how loud the audio is on a specific track.
This is different from the audio clip mixer, so go to the top in Premiere Pro, and you'll be able to find the audio track mixer if it's not already in your panels. The first thing you’d want to do is go to your window and open up the essential sound panel.
Go ahead and select all your dialogues and then click ‘dialogue’ in the essential sound panel. Underneath the loudness section, click ‘auto-match’. This makes all your dialogue roughly the same loudness. Then, with all the dialogue still selected – go to the bottom of the essential sound panel and you can adjust the volume for all the clips all at once. Now you can adjust your music so that it sounds natural and isn't overpowering or too soft.
Let's say our music track is way too loud, then first, we need to click ‘music’ in the essential sound panel. Select ‘ducking’ and make sure the dialogue icon is selected at the left-hand corner and then click ‘generate keyframes’.
This will generate keyframes so that it lowers the volume of the dialogue.
If you want to lower it slightly more still, go ahead and click the amount that it ducks and then click ‘generate keyframes.’
Once in a while, I like to adjust my keyframes manually but the auto-ducking is amazing for getting you just about there, every time.
If your dialogue or music peaks at certain times or gets slightly too loud, you can also apply a compressor to individual clips, entire tracks, or even the whole mix of all the audio.
Under the audio track mixer, you can select ‘dynamics’ and apply this to a particular track or apply it to all the tracks on the far right-hand side. I like to use the soft compressor preset, which keeps the volume in check. The key is to set your volume as close to spot on as possible, before using these effects.
Rely on your audio meters
It's also essential to have your volume set correctly on your speakers. I usually leave my volume right in the middle. If it’s set too low, you're going to want to naturally gravitate towards making your audio louder, and if your speakers are too loud, you're going to want to lower the volume too much.
This circles back to relying on your audio meters instead of just listening to what's coming out of your speakers. If you don't have monitors for your computer, I'd recommend using some headphones since sometimes computer speakers don't give an actual representation of what's coming out. Before you show your videos for the world, it's important to export and play it on your phone, TV, or other gadgets. That way you can listen to make sure it sounds good on multiple devices rather than just on your computer. I usually ask my wife or a friend to take a listen as well. A lot of times, they will tell me if the music is too loud or too soft or if my dialogue isn't loud enough. So having a second set of ears is truly valuable.
The biggest takeaway from this video is pretty simple: set the volume of your dialogue and then adjust your music accordingly. Since every track is a bit different, you'll have to lower the volume depending on how loud it is.
Don’t miss our next blog post with Ben Hess for Epidemic Sound and Adobe Stock, where he will tell you all there is to know about high and low pass filters.
Ben Hess is a director, cinematographer, filmmaker, and Epidemic Sound Ambassador. Check out his YouTube channel here.
Looking for high-quality music for your projects? We've got you covered!

If you want to learn more about about adjusting audio levels, check out our video with Epidemic Sound ambassador Meredith Marsh below.
Are you a video editor or filmmaker? Whether you’re an absolute master or just a beginner, discover what Epidemic Sound has to offer on our Epidemic Sound for Filmmaking page. Oh, and if you’re looking for some background music for your videos, we got you covered.